There are no results matching your search
How to Draw a Ghost Step by Step - 9 Easy Steps!

- By Joanna | updated in December, 2023
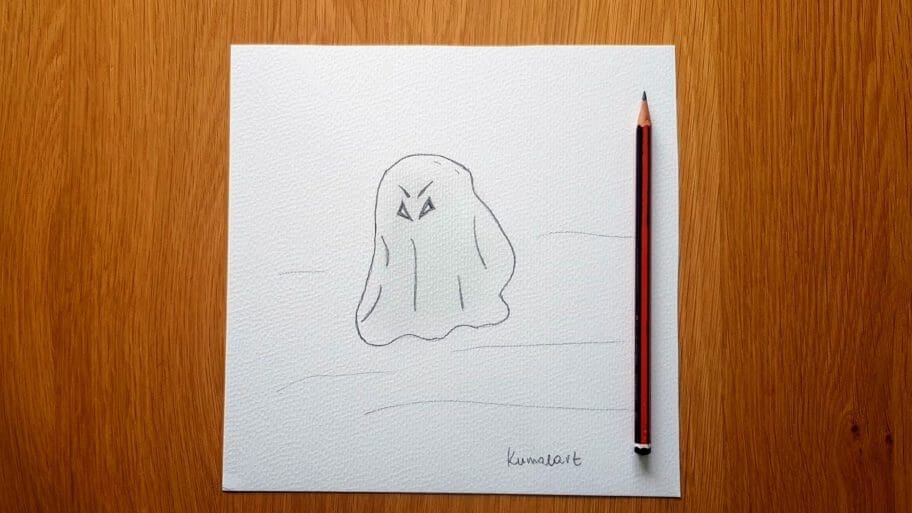
In this fun and easy ghost drawing tutorial, you’ll learn how to draw a ghost step by step.
This drawing a ghost step by step tutorial is great for beginner artists (both kids and adults) who want to improve their drawing skills.
Fun Fact: Did you know that Halloween decorations shaped like ghosts or jack-o’-lanterns have existed since the 17th century?
Halloween is the perfect time to learn how to draw a ghost. It’s a fun and easy way to get into the spooky holiday spirit.
Once your supplies are ready, follow these steps to create your ghost drawing.
Table of Contents
ToggleWhat You’ll Need for Your Ghost Drawing
We’ll be creating our ghost drawing using the following materials:
- A piece of paper
- A pencil
- An eraser
How to Draw a Ghost Step by Step
Follow along and learn how to draw ghost step by step.
We’ve included all of the steps in detail so that the process is easy to follow.
So, if you’ve got your art supplies ready, let’s get started!
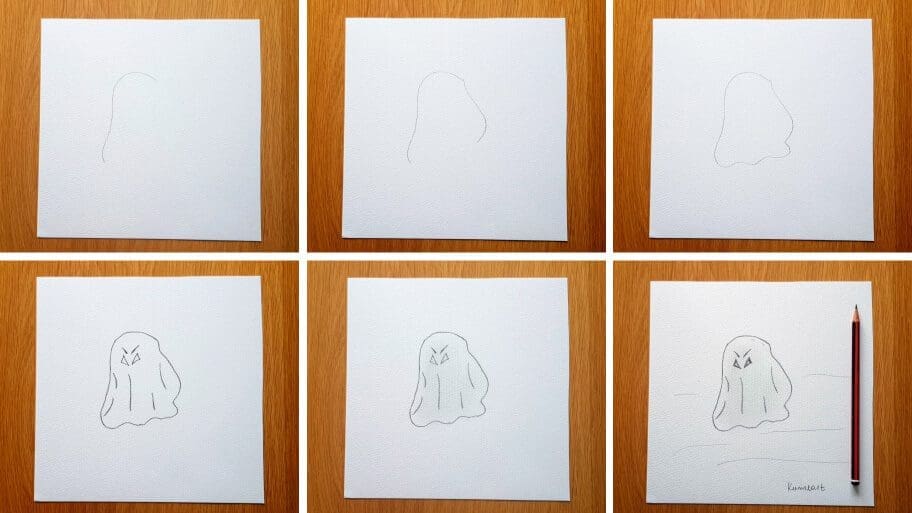
The collage above shows each step of the process so you know what your ghost drawing should look like at each stage.
Instructions on How to Draw a Scary Ghost Step by Step
Tip: Make sure you don’t press too hard on the paper when you draw your pencil lines so that you can correct your mistakes with an eraser as you go through the tutorial.
Step 1: Draw the Ghost Outline
Start your ghost design by drawing a basic ghost shape.
A. Draw a wavy curved line on the left side of your paper using a light pencil stroke.

B. Draw a second shorter curved line on the right side and connect it to the initial line you drew.

C. Draw another, more wavy line between the lines you just drew to complete its curved shape.

Step 2: Draw a Scary Face
Now it is time to draw a facial expression on your ghost to give it a unique personality.
A. Draw two triangle shapes for the eyes.
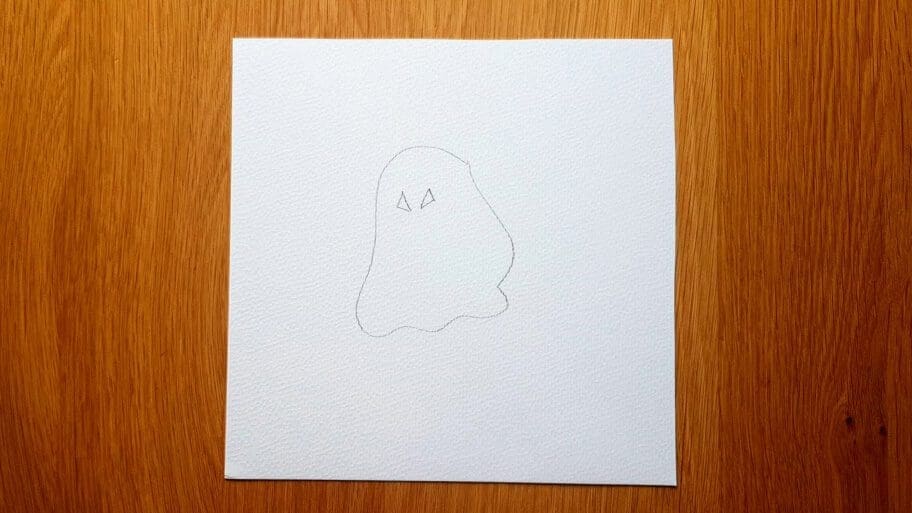
B. Draw an arch above the eyes like eyebrows to create a definite face.

Step 3: Add Details
Draw a few vertical lines to add more details to your ghost drawing.
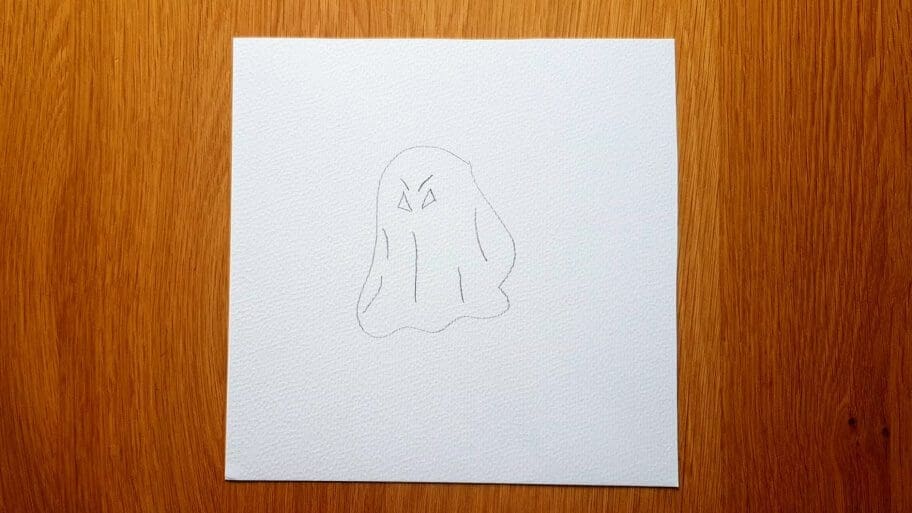
Step 4: Outline the Ghost
Outline the ghost using a darker pencil stroke.

Step 5: Add Shading
To add a realistic shaded effect, use your fingers to smudge the pencil lines you have just drawn.
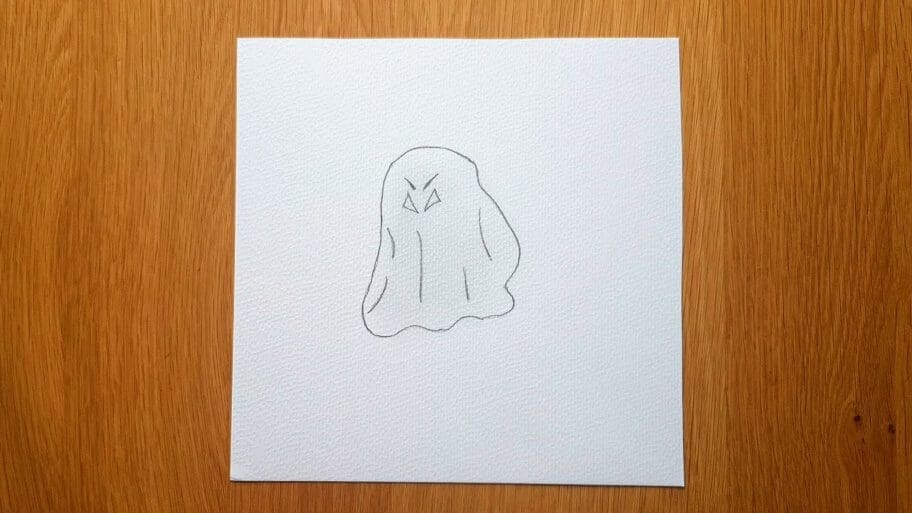
Step 6: Create a 3D Eyes Effect
Draw some short curved lines inside the eyes to create a 3D effect and bring them to life.

Step 7: Draw the Floor
Draw curved lines to create a “floor” beneath the ghost, making it look like it is hovering above the ground.

Congratulations!
There you have it. Now you know how to draw a ghost!
Don’t worry if your step by step ghost drawing isn’t perfect the first time, the more you practice the better you will get!
Top Tips on How to Improve Your Ghost Drawing:
Here are some tips to help you make the best ghost drawing!
Use Colored Pencils
Adding color to your ghost drawing will make it look even more impressive. Use colored pencils or watercolor paints to give your ghost a unique, vibrant look.
Use a Reference Picture
Check royalty free stock photos of ghosts to get an idea of how they should look. This can help you when it comes to adding details and shadows.
Take Your Skills to the Next Level
If you want to take your ghost drawing skills one step further, try coloring book pages. With these, you can practice drawing more detailed designs that will help you improve your shading and blending skills even further.
We hope this step-by-step guide has helped teach you how to draw a ghost!
With these tips and some practice, you’ll be creating fantastic ghost drawings in no time!
Be sure to practice this ghost drawing until you get it just right.
Then try drawing a scary ghost drawing or a scary pumpkin drawing.
Soon, you’ll be a master at spooky drawings!
Looking for more drawing tutorials? Search our list of 101+ Drawings.
Happy drawing!


