
In this fun and easy mushroom drawing tutorial, you’ll learn how to draw a mushroom step by step.
This draw a simple mushroom tutorial is great for beginner artists (both kids and adults) who want to improve their drawing skills.
It doesn’t matter if you’re using colored pencils, graphite, or markers – you can draw a mushroom with any of these!
Mushrooms are an interesting and fun subject to draw. They are very recognizable, but also unique and can be quite detailed.
Mushrooms also come in a variety of shapes and sizes, so you can make your drawing unique by experimenting with different shapes.
Fun Fact: Did you know that there is a type of mushroom called the ‘Glow-in-the-Dark’ mushroom? And that it does glow in the dark!
Once you have completed this tutorial, you’ll end up with an awesome drawing of a mushroom.
We’ll be creating our mushroom drawing using the following materials:
Follow along and learn how to create a mushroom easily.
In this drawing lesson, we’ve included all of the steps in detail so that the process is easier for you.
So, let’s get started!

The collage above shows each step of the process so you know what your mushroom drawing should look like at each stage.
Tip: Make sure you don’t press too hard on the paper when you draw your pencil lines so that you can correct your mistakes with an eraser as you go through the tutorial.
Draw an oval shape to create the base of your first mushroom using a light pencil stroke.

Now draw the second smaller oval shape just below the first one.

Draw two vertical curved lines at the bottom of the first mushroom to form the stem.

Draw two smaller curved lines and attach them to the second mushroom head.

Sketch an uneven cap around the mushroom’s head. Start at the top and draw a curved line downwards.
A. The first mushroom cap.

B. The second mushroom cap.

Add a tiny curved line on the top of each stem.

Draw two lines around each stem with a zigzag shape on the end to create the rings.

Draw some wrinkles or ridges in the stalks to create gills by adding small lines inside each mushroom head.

Outline the small mushroom with a darker pencil. Don’t forget to add some texture around the stem and inside the cap as well!

Repeat the process from Step 9.

Draw small circles in different sizes to create the spores.

Repeat the process from step 11.

Draw the grass around your mushrooms to look like they’re growing in a field.

Draw a few horizontal lines to form the ground.

Add shadows and highlights to your mushrooms by using a criss-cross hatching technique. Then use your fingers to smudge the pencil strokes.

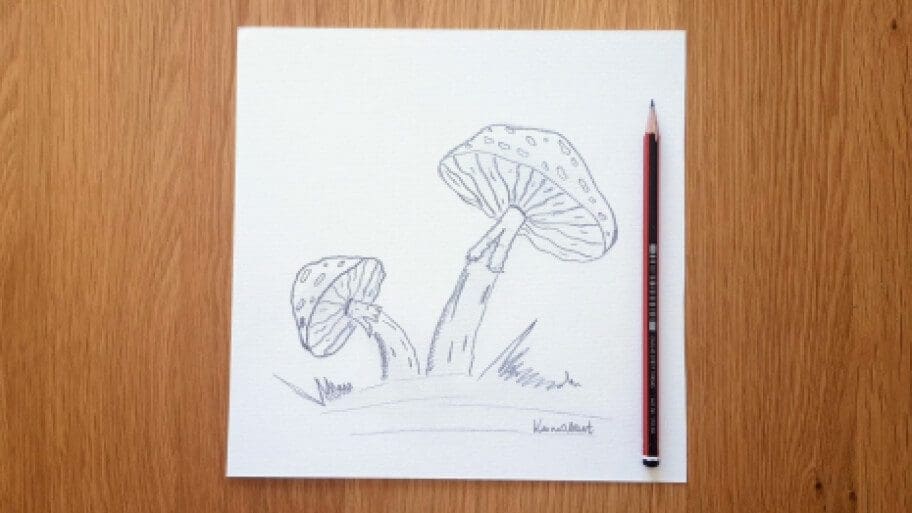
There you have it. Now you are an expert in mushroom drawings easy! We hope you enjoyed this tutorial.
You can now proudly display your simple mushroom drawing on the fridge, in a frame, or even share it with friends and family.
Don’t worry if your mushroom vegetable drawing isn’t perfect the first time, the more you practice the better you will get!
Be sure to practice this mushroom drawing until you get it just right.
If you want to draw mushrooms that look realistic, it’s best to start by looking at real-life reference photos.
Experiment with different tools such as colored pencils and markers. This can help make your mushroom drawings more vibrant and eye-catching.
You can also add an extra layer of fun to your mushroom drawing by adding a glow-in-the-dark effect. All you need is a glow-in-the-dark paint or a glow-in-the-dark pen.
Then, try to draw vegetables like an onion or a pumpkin.
Soon, you’ll be a master at vegetable drawing!
Are you looking for more drawing tutorials? Search our blog post of 101+ Drawing Ideas.
Happy drawing!


