
In this fun and easy parrot drawing tutorial, you’ll learn how to draw a parrot step by step.
This parrot drawing easy tutorial is great for beginner artists (both kids and adults) who want to improve their drawing skills.
Parrots are a type of bird that are known for their vibrant colors, and their ability to mimic human speech.
Their bright colors make them a popular subject for artists to draw. In this tutorial, you will learn how to draw a parrot using simple shapes and lines.
Follow along with our how to draw a parrot easy lesson to create your cool parrot drawing.
We’ll be creating our parrot drawing step by step sketch using the following materials:
Follow along and learn how to draw a parrot sketch.
With a few basic shapes and our step-by-step instructions, you can create a realistic-looking parrot drawing.
Let’s get started!
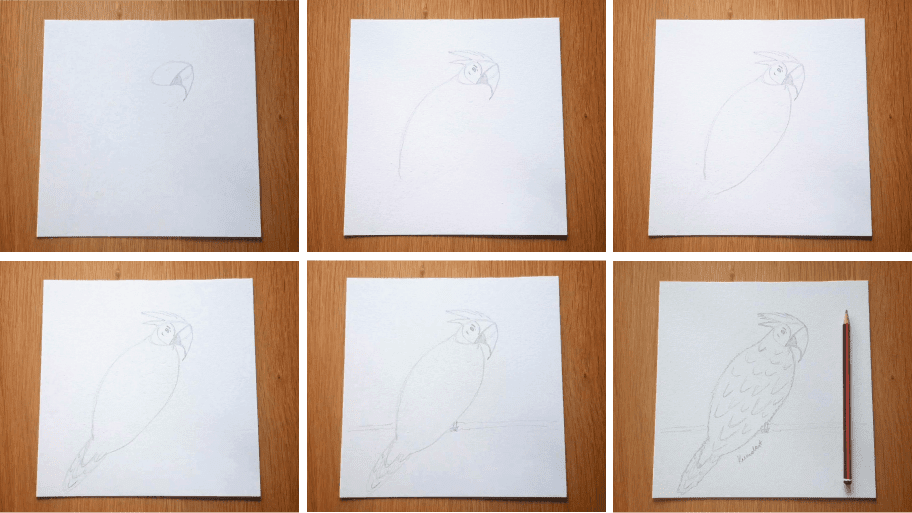
The collage above shows each step of the process so you know what your drawing parrot easy sketch should look like at each stage.
Tip: Make sure you don’t press too hard on the paper when you draw your pencil lines so that you can correct your mistakes with an eraser as you go through the tutorial. This will also make it a lot easier to erase pencils when you finish your artwork.

Step 1.1 Start by drawing a letter c shape with the top part of the letter extending further to the right.
Step 1.2 Join the top of the letter c shape to the bottom of the letter c shape.
Step 1.3 Draw a curved line from the top of the c shape to create the front of your parrot’s beak.
Step 1.4 Complete the beak outline by drawing a backward c shape connecting the bottom point of the beak to the bottom of the main c shape from step 1.1.
Step 1.5 Draw a triangle shape in the bottom left corner of the beak and shade it in with your pencil.
Draw a small circle for the eye and shade it in with your pencil.

In the previous step, we drew the eye. Now it’s time for the eyebrow.
Draw two lines; one line should start from the top of the eye and the other line should start at the bottom of the eyeball.

Draw the Parrot’s crest by adding three different shapes of triangles to the head.

Add two small curved lines inside your parrot’s head.

Start by drawing a curved line coming down from the left side of the head.
This will be the main focus of the body, so make sure that it is slightly larger than the other lines.
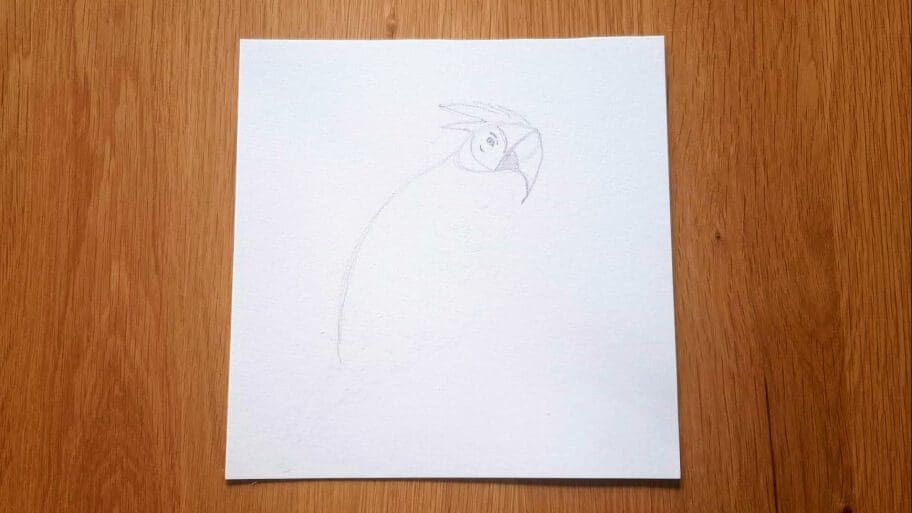
Draw a very small curved line from the bottom of the head under the beak. This will be the beginning of the neck.

Start by drawing a curved line coming down from the top right of the neckline you created in step 7 creating a streamlined shape for the body.

Now let’s give our parrot some tail feathers.
First, draw a curved line coming down from the bottom of the body.
Then add lots of backward c shapes inside to create the feathers.

Draw two tiny lines coming down from the bottom part of the body for the legs.

Then add a small triangle under each leg to create feet.

Draw two horizontal lines on each side of the parrot to create the branch making sure the bottom right line is under the parrot’s feet.

Now that the branch has been added, you can erase any unwanted pencil marks.

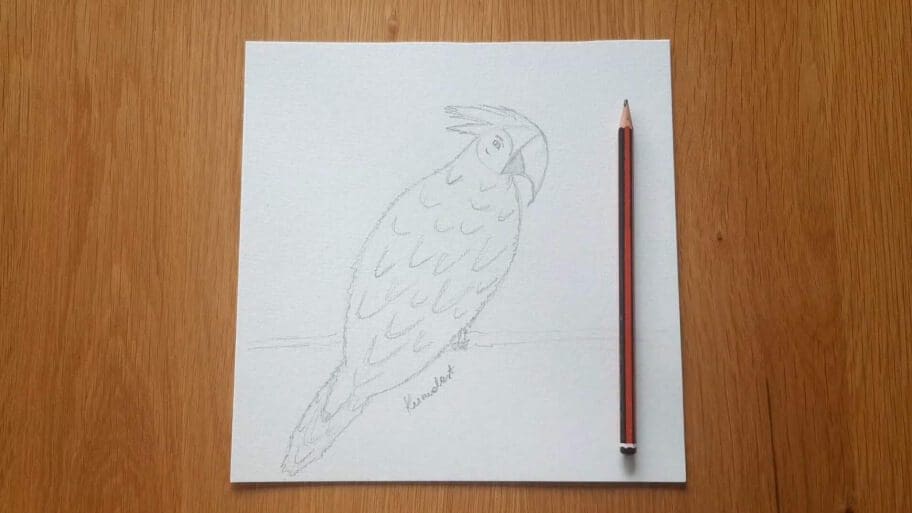
Now let’s start adding some details to our drawing. Draw curved lines on the body to create the feathers.

There you have it. You just finished drawing your parrot.

Don’t worry if your parrot simple drawing isn’t perfect the first time, the more you practice the better you will get!
Be sure to practice this parrot drawing until you get it just right. Soon, you’ll be a master at parrot drawings!
Looking for more drawing inspiration? Check out our other drawing tutorials like our list of 101+ Drawing Ideas!
Happy drawing!

