

In this fun and easy rose drawing tutorial, you’ll learn how to draw a rose step by step.
This steps how to draw a rose tutorial is great for beginner artists (both kids and adults) who want to improve their drawing skills.
Drawing roses doesn’t have to be difficult. All you need are a few simple shapes and techniques to make your rose look realistic.
Fun Fact: Did you know that red rose petals can contain up to 300 different pigments?
At the end of this tutorial, you’ll have a real rose drawing to show off!
You’ll need the following materials to create your rose drawing:
Follow along and learn how to draw a rose in steps.
We’ve included all the steps in detail so that the process is easy and fun for everyone.
So, let’s get started!

The collage above shows each step of the process so you know how to draw rose step by step sketch should look like at each stage.
Tip: Make sure you don’t press too hard on the paper when you draw your pencil lines so that you can correct your mistakes with an eraser as you go through the tutorial.
Draw a semi-circle shape as the base of your rose. This should form the center of the flower and will act as an anchor for all other petals.

Draw several curving lines that radiate outward in all directions.
Make sure to keep them spaced evenly apart and gradually taper off towards the ends.

Draw more curved lines that start from the center and move outward.
Repeat until you have as many petals as desired. The outer petals should also be tapered off towards the end.

Draw six tiny lines on either side of your flower bud.
These will act as sepals for the flower and should be slightly curved.

Sketch out two long, vertical lines to form the stem.

Draw two medium size slightly curved lines on the right side of the rose to form the stalk.

Draw a few tiny lines and leaf shapes on each side of the first stalk.

Draw two medium size curved lines on the left side of the rose to create a second stalk.
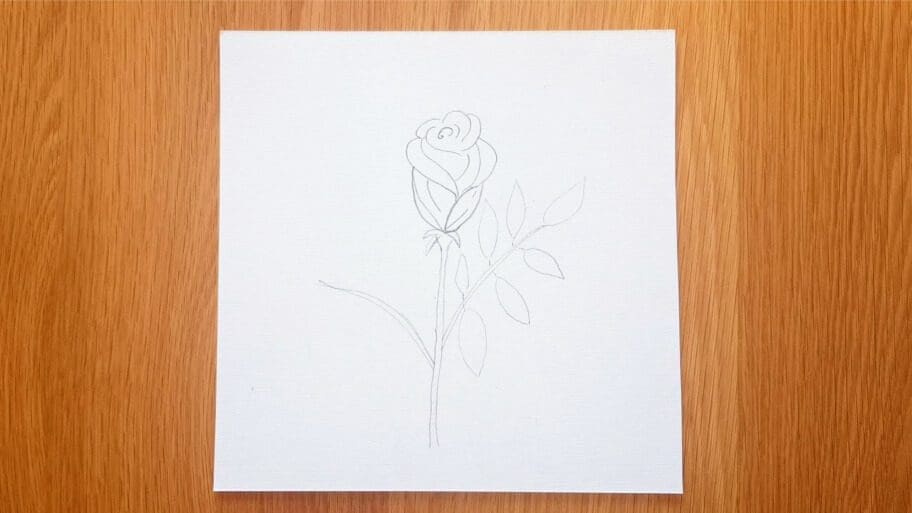
Draw a few tiny lines and leaf shapes on the second stalk.

Outline each of the sepals using a darker pencil stroke.

Outline the stem using a darker pencil stroke.
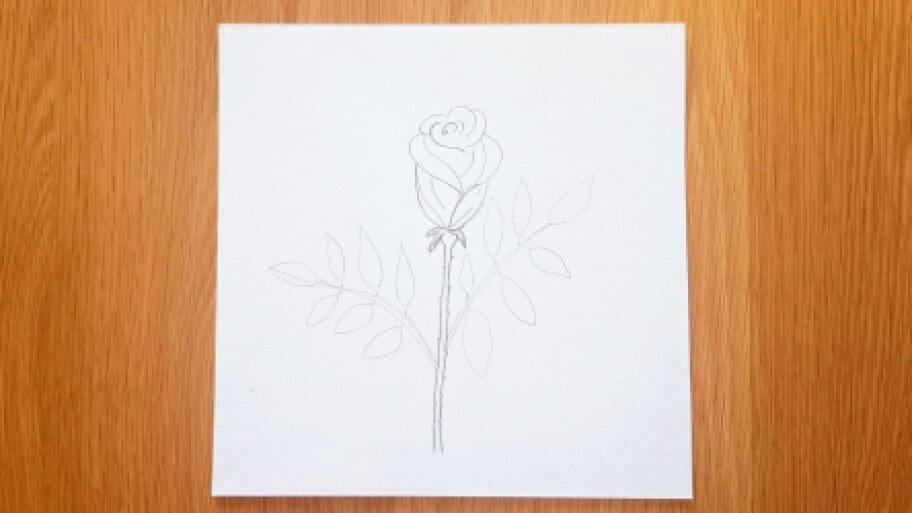
Outline the stalks and leaves on the right side to give them more definition.

Repeat Step 12 on the left side of the rose.

Add texture and dimension to your drawing by adding small lines on each leaf.

Using a darker pencil, start adding shading to the flower.
A. Begin with the petals.

B. Then move on to the stalk.

Draw a few small lines on the stem and both stalks to create the prickles.
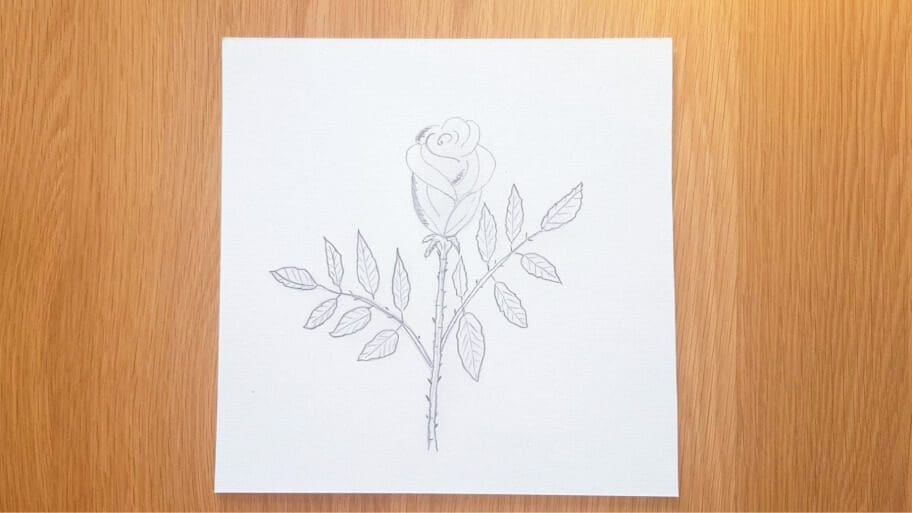
Draw a few curved lines on each petal.

Finally, erase any unwanted pencil marks to finish your rose drawing.

There you have it! Your final results. Now you know steps of how to draw a rose!
Don’t worry if your rose drawing isn’t perfect the first time, the more you practice the better you will get!
Be sure to practice this rose pencil drawing until you get it just right. Then, try drawing other flowers, like a sunflower or a tulip.
Reference photos can be a great way to learn how to draw a rose from scratch. Look for reference images that show you the different parts of a rose, like the petals, leaves, and prickles. This can make it much easier to draw a realistic-looking rose.
If you’re having trouble drawing a rose from scratch, try tracing over a reference image. This can help you learn the different parts of a rose and how they fit together. Just remember to draw it freehand afterward so that you can practice your skills.
Experiment with different pencils and brushes to create different effects. You can use a thicker brush for larger petals, or use shading to add texture and depth. This can help you create a more realistic looking rose drawing.
Roses come in many different shapes and sizes. Don’t be afraid to practice drawing different types of roses, like single-petal or double-petal varieties. This will help you gain more practice and understand how the shape and size of a rose can affect its overall look.
Soon, you’ll be a master at rose drawing!
Are you looking for more drawing ideas? Search our list of 101+ Drawing Ideas.
Happy drawing!


