There are no results matching your search
How to Draw a Seahorse Step by Step - 17 Easy Steps!

- By Joanna | updated in December, 2023

In this fun and easy seahorse drawing tutorial, you’ll learn how to draw a seahorse step by step.
This seahorse drawing easy tutorial is great for beginner artists (both kids and adults) who want to improve their drawing skills.
Seahorse drawing for kids can be an exciting and imaginative activity, incorporating simple shapes and curves to create the unique body of the seahorse, offering a fun opportunity for young artists to explore underwater creatures through art.
Seahorse drawings can be a great way to express creativity in your artwork. With just a few simple steps, you can create an amazing seahorse drawing that will bring your artwork to life.
A Seahorse is a fish of the family Syngnathidae, and its body is covered with protective spines.
Fun Fact: Did you know that seahorse tails are curved and they use them to cling onto underwater plants and coral?
Table of Contents
ToggleWhat You’ll Need
We’ll be creating our seahorse drawing using the following materials:
- A piece of paper
- A pencil
- An eraser
How to Draw a Seahorse Step by Step
Follow our seahorse how to draw step by step tutorial covering how to draw a simple seahorse.
We’ve included all of the steps in detail so that the process is easy to follow.
So, let’s get started!

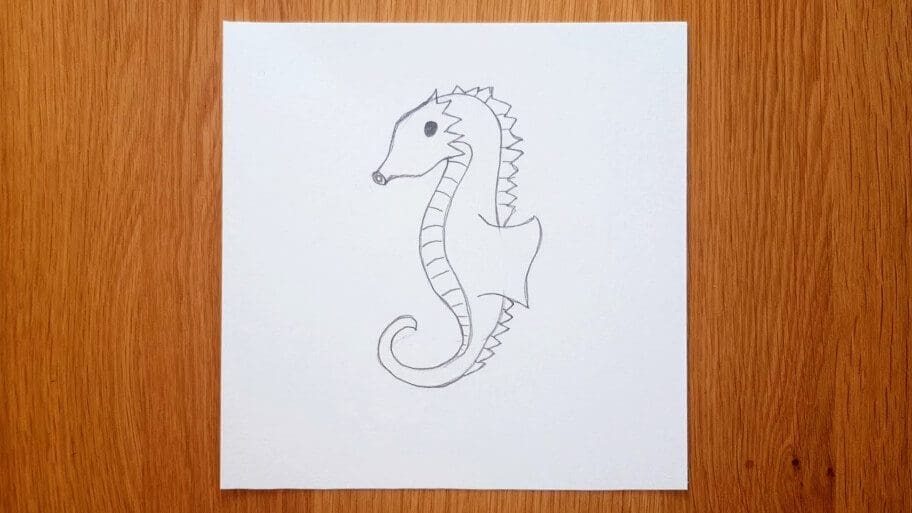
The collage above shows each step of the process so you know what your seahorse drawing should look like at each stage.
Instructions on How to Draw Seahorse
Tip: Make sure you don’t press too hard on the paper when you draw your pencil lines so that you can correct your mistakes with an eraser as you go through the tutorial.
How to Create a Seahorse Sketch
Step 1: Draw the Body Shape
Using light pencil marks, draw a long medium oval for the body as guidelines for the shape of your Seahorse.

Step 2: Create the Head Shape
Again, use light pencil marks to draw a smaller oval shape which will be used to create the head later.

Step 3: Draw the Tail Shape
Then, using light pencil marks again, draw another small oval shape at the end of the medium oval.

Step 4: Connect the Head with the Body and Tail
A. Draw a curved line on the right side.

B. Draw a curved line on the left side.

Step 5: Draw the Face
Draw two curved lines at the end of a small oval.

Step 6: Draw the Eye
Draw a small circle inside the head to create the eye.

Step 7: Draw the Snout
Draw two curved lines at the end of the lines you created in Step 5. Then connect them with two circles, one inside the other.

Step 8: Finish the Tail
Draw two curved lines on the top of your last small oval guidelines.

Step 9: Erase Your Pencil Marks
Erase any unwanted pencil marks.

Step 10: Draw a Dorsal Fin
Draw two curved lines in the middle of the seahorse’s body. Then connect them with a vertical reverse “s” shaped line in between.

Step 11: Create the Body Segments
A. Create a head segment by drawing a zigzag shape just behind the eye. Then create a front body segment by drawing a long curved line starting from the head and finishing by the end of the body.

B. Create the dorsal spines by drawing a long zigzag shape from the head to the middle of the tail.

Step 12: Outline Your Seahorse
Draw darker pencil lines to the outline of your drawing to make the drawing more clear.

Step 13: Shade the Eye Using Your Pencil.
Add color to the eye by shading with your pencil.

Step 14: Finish the Front Body Segment
Next, add several horizontal lines to the front body segment.

Step 15: Finish the Dorsal Spines
Add several horizontal lines to the dorsal spines.

Step 16: Finish the Dorsal Fin
Add several small lines to the dorsal fin.

Step 17: Add Shading
Finally, use your pencil to add shading and bring your seahorse drawing to life.

Congratulations!
You have just finished drawing a seahorse.
Don’t worry if your sea horse drawing easy isn’t perfect the first time, the more you practice the better you will get!
We hope you had fun and that our tutorial helped you learn something new today.
Try out your newly learned skills on different sea creatures like an octopus or a whale and have fun practicing until you master the art of drawing!
Bonus Tips on How to Improve Your Seahorse Easy Drawing
- Look at illustrations of real seahorses to get a better understanding of their shapes and proportions.
- Practice drawing from different angles and perspectives.
- Focus on one area of the seahorse at a time and don’t try to draw the entire figure all at once.
- Change up your tools: try using different types of pencils or markers to add texture, shadows, and highlights to your artwork.
- Think about lighting and how it affects the way you shade when you draw your seahorse.
- Try different poses and expressions with your seahorse drawing to make it more dynamic.
- Try sketching with different pencils for shading purposes. Try out softer leads for dark areas and harder leads for lighter areas.
- Draw in the details like fins, eyes, and other textures to make your drawings more realistic and interesting.
- Explore different techniques with color, such as watercolor or colored pencils.
Soon, you’ll be a master at sea creature drawings!
Looking for more similar drawing tutorials? Search our list of 101+ Drawing Ideas!
Happy drawing!


