There are no results matching your search Reset filters?
How to Draw a Tulip Step by Step - 13 Easy Steps!

- By Joanna | updated in December, 2023

In this fun and easy tulip drawing tutorial, you’ll learn how to draw a tulip step by step.
This step by step tulip drawing tutorial is great for beginner artists (both kids and adults) who want to improve their drawing skills.
Tulip petals are easily recognizable and their bright colors make everyone love them. Orange, yellow, red, and purple are the colors usually associated with tulips.
Fun Fact: Did you know that a red tulip symbolizes love?
At the end of this tutorial, you’ll have a real tulip drawing to show off!
Table of Contents
ToggleWhat You’ll Need for Your Tulip Sketch
You’ll need the following materials to create a simple tulips drawing:
- A piece of paper
- A pencil
- An eraser
How to Draw a Tulip Step by Step
Follow along and learn how to create a tulip step-by-step.
We’ve included all the steps in detail so that the process is easy and fun for everyone.
So, let’s get started!
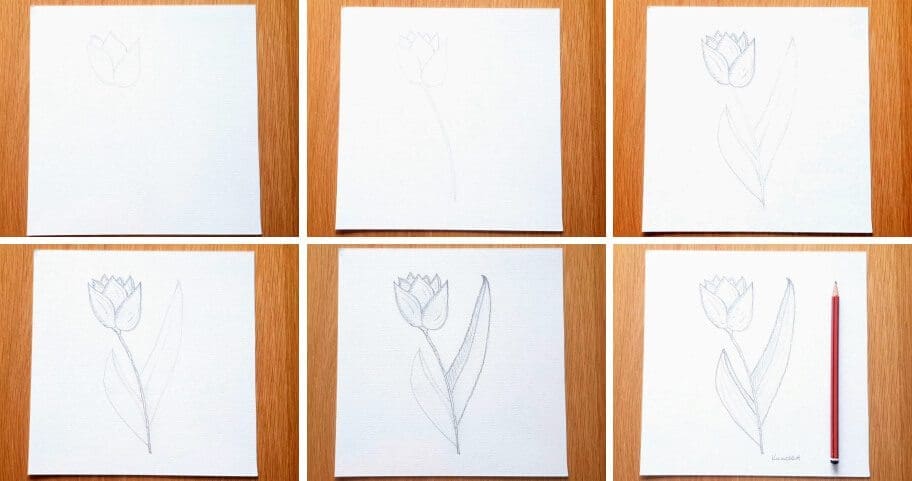
The collage above shows each step of the process so you know how to draw tulips step by step sketch should look like at each stage.
Instructions for Your Tulip Drawing Step by Step
Tip 1: Make sure you don’t press too hard on the paper when you draw your drawing lines so that you can correct your mistakes with an eraser as you go through the tutorial.
Tip 2: Make sure that one structure of the petals is slightly curved and the other one has a sharp point.
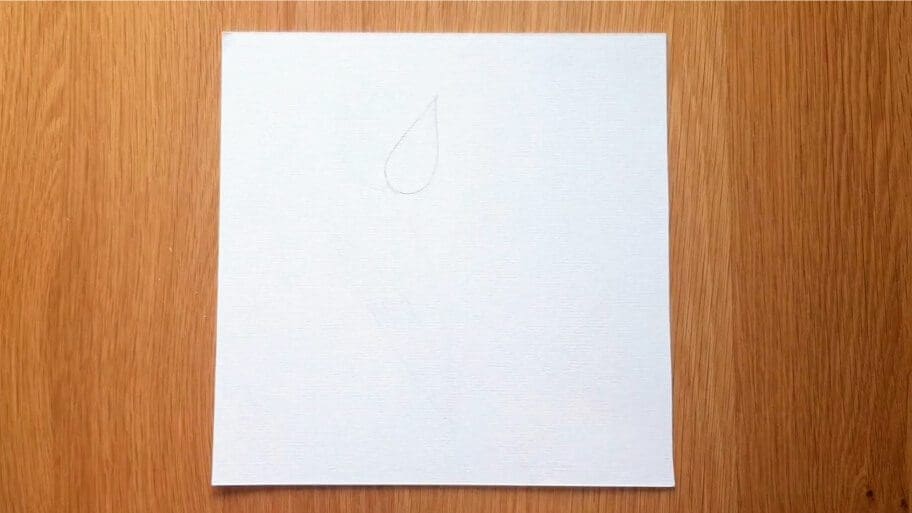
Step 1: Draw the First Flower Petal
Draw a raindrop shape to form the first petal. Use a light pencil stroke.
Step 2: Draw the Second Petal
Draw the second raindrop shape next to the first one.

Step 3: Add Another Smaller Petal
Draw two tiny curved lines next to the top of the second petal you drew in Step 2.

Step 4: Draw the Middle Petal
Move to the middle of the tulip and draw two curved lines to form the middle petal.

Step 5: Add One More Petal
Draw an extra petal next to the first one, leaving some space in between them.
Draw two tiny curved lines.

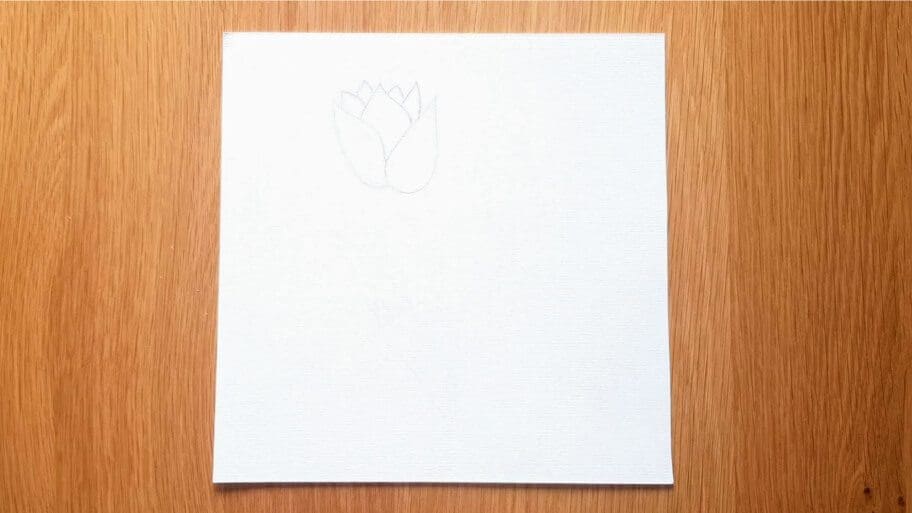
Step 6: Draw the Final Petal
Add two more tiny petals to the tulip on each side of the middle petal.
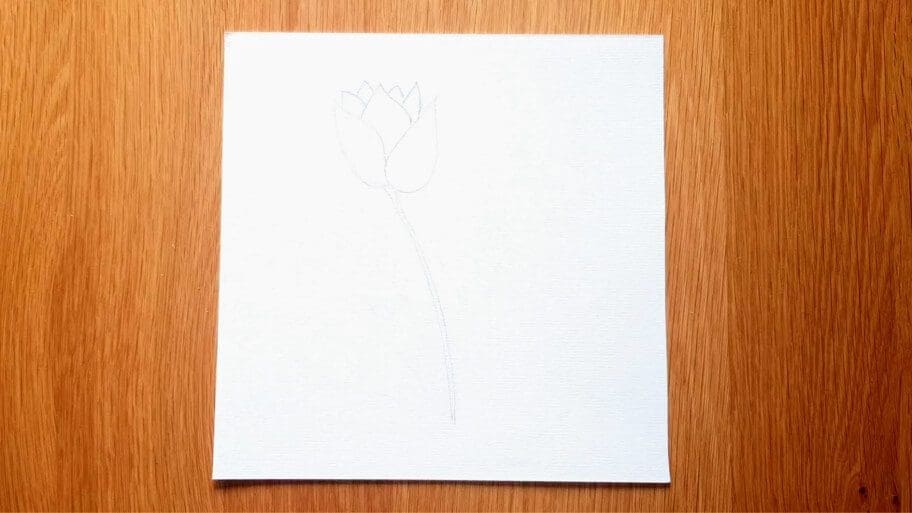
Step 7: Draw the Stem
Draw two long curved lines, starting from the middle bottom of the tulip.
Step 8: Draw the Leaf Line
Draw two long curved lines on the right side of the tulip to form the first leaf.

Step 9: Draw the Second Leaf
Draw two long curved lines on the left side of the tulip.

Step 10: Outline the Tulip
Outline the tulip with a darker pencil stroke. Then fill it in with shading lines to make it look more realistic.

Step 11: Add the Details
Draw a few small lines on the tulip.

Step 12: Outline the Stem
Outline the stem with a darker pencil stroke. Then add a few small lines on the stem.

Step 13: Outline the Leaves
A. The first leaf
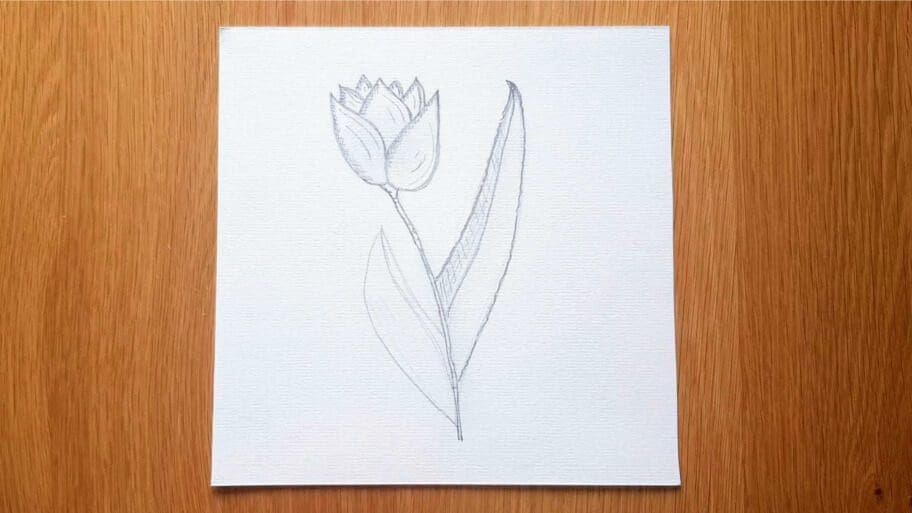
B. The second leaf

Congratulations!
There you have it. Your final results. Now you know how to draw a tulip!
Hope you enjoyed this tulip sketch easy tutorial and that you learned something new.
Don’t worry if your tulip drawing simple isn’t perfect the first time, the more you practice the better you will get!
Be sure to practice this flower drawing until you get it just right. Then, try drawing other flowers, like a sunflower or a rose.
Bonus Tips on How to Improve Your Tulip Drawing
Try Different Colors
Try using colors, such as markers or colored pens. This will add a fun and unique look to your tulip drawing.
Use Image References
It’s always helpful to look at a tulip drawing reference photo when drawing tulip. This will give you an idea of how the flower looks in real life and help you draw it more accurately.
Experiment with Perspective
If you want to create an interesting effect, experiment with the perspective of your drawing. Try changing angles or adding in more petals to create a 3D effect.
Soon, you’ll be a master at flower drawing!
Are you looking for more drawing ideas? Search our list of 101+ Drawing Ideas!
Happy drawing!

Joanna
Latest Posts
Trending
There are no results matching your search Reset filters?


