
In this fun and easy orange drawing tutorial, you’ll learn how to draw an orange step by step.
This orange draw easy tutorial is great for beginner artists (kids and adults) who want to improve their drawing skills.
Drawing oranges can be very easy if you use some basic shapes to map out your drawing before adding any details.
Fun Fact: Did you know that oranges are a hybrid of the Pomelo and Mandarin, two other citrus fruits?
Once you have your supplies ready, follow these easy steps to create your orange fruit drawing.
We’ll be creating our orange drawing using the following materials:
Follow along and learn how to draw orange.
We’ve included all of the steps in detail so that the process is easy to follow.
So, if you’ve got your art supplies ready, let’s get started!
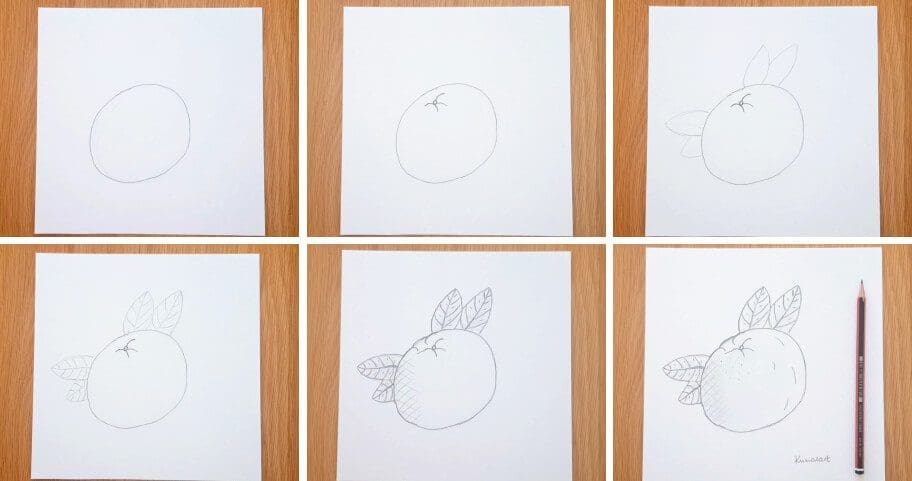
The collage above shows each step of the process so you know what your orange drawing should look like at each stage.
Tip: Make sure you don’t press too hard on the paper when you draw your pencil lines so that you can correct your mistakes with an eraser as you go through the tutorial.
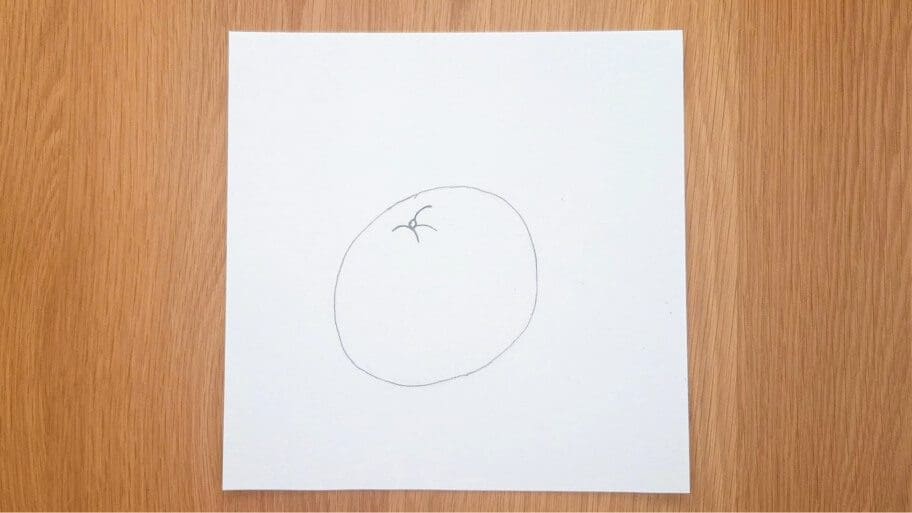
The first step is drawing the outline of the orange.
Start by drawing a medium oval shape.

Draw two curved lines and connect them at the bottom of the oval.
A. Draw the first curved line on the right side.

B. Then draw the second line on the left side.

Now you can erase any unwanted pencil marks.

Draw a small circle at the top of your orange. Then add a few curved lines.
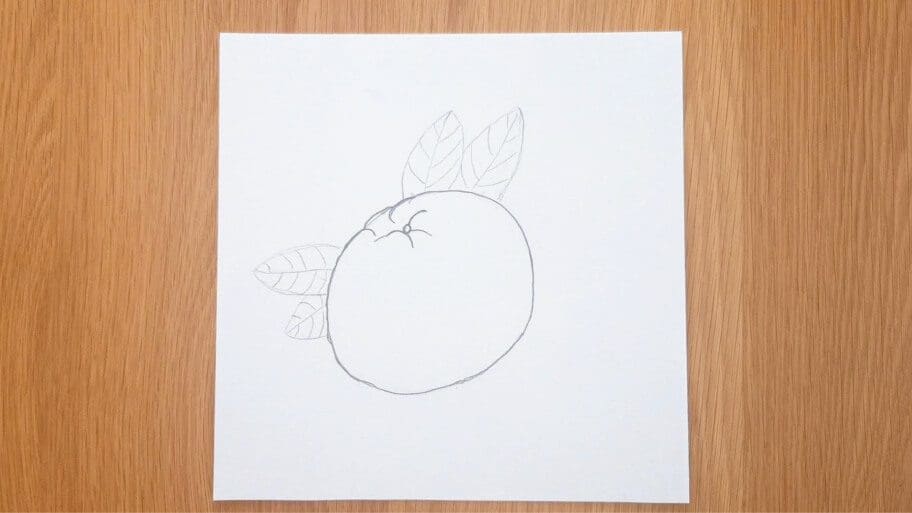
Starting from the top of the orange, draw two leaf shapes on the left and two on the right.

Draw several small lines inside the leaves to create the veins.

To add some more realism, draw rough edges around the shape of your orange. Then add a few curved lines on top of your orange to create more texture.
Use a darker pencil mark to add some depth and texture to the leaves of your drawing.

A: Draw some fine lines on the left side of the main body of your orange.

B: Draw some more fine lines in the opposite direction to create a criss-cross pattern.

Draw several lines and dots on the orange skin to give it a more realistic look.
You can also smudge the criss-cross pattern with your finger to create a softer texture.

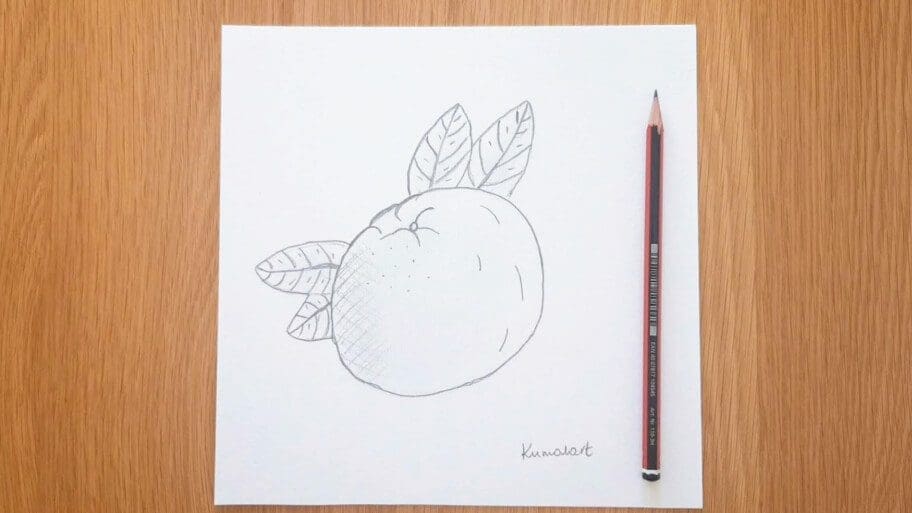
There you have it. Now you know how to draw an orange!
Don’t worry if your orange step by step drawing isn’t perfect the first time, the more you practice the better you will get!
Be sure to practice this orange drawing step by step until you get it just right. Then, try drawing other fruits, like blueberries or strawberries.
Soon, you’ll be a master at drawing fruits!
Practice with different pencils, erasers, a small blending brush, and paper until you find the right combination that suits your needs.
If you’re struggling to draw an orange, use reference images of real oranges to help you get the right shape.
Drawing an orange in its simplest form will help you learn the basics. Start by sketching circles, then refine your shapes until it looks like an orange.
Using different mediums like acrylic paint, watercolors or colored pencils can add interesting details and textures to your artwork.
Acrylic paint is great for creating a variety of textures, from bold strokes to delicate lines. Olive brown paint can be used to create subtle shadows and highlights, adding dimension to your piece.
Colored pencils are a fantastic way to add fine details that regular paints just can’t do. With colored pencils, you can blend colors or create a range of shading effects.
Whether you’re a beginner or a professional artist, having different mediums available to you gives your artwork depth and texture that will truly make it stand out.
Adding contrast to your artwork is an important step in creating something that stands out. Consider the contrast between light and dark colors, warm and cool tones, and busy and simple elements.
By adding areas of both boldness and simplicity throughout your piece, you can create a balanced composition with plenty of visual interest. You can also use contrast to draw attention to certain areas or features within your artwork that you want to highlight.
The composition of your artwork is an important consideration. Think about where different elements should be placed within the image and how they relate to each other.
According to the principles of design, there are a variety of ways to arrange visual elements in an effective manner that will draw attention and create interest. Consider lines, shapes, textures and shadows when deciding on the composition of your artwork. This can help create an aesthetically pleasing and harmonious piece.
Using color can make your sketch look more lifelike. Using black paint, white paint or orange paint are the three primary colors to start with.
These three colors will give you a better understanding of color blending and depth. Black paint will help establish shadows, lines, and details in your drawing. White paint can be used to create highlights and lighter areas in your composition. Orange paint will add vibrancy to your artwork, making it come alive.
Finally, have fun and enjoy the process of creating your orange drawing.
Are you looking for more drawing tutorials? Search our list of 101+ Drawing Ideas!
Happy drawing!

