
In this fun and easy Christmas tree drawing simple tutorial, you’ll learn how to draw a Christmas tree step by step.
This Christmas drawing easy tutorial is great for beginner artists (both kids and adults) who want to improve their drawing skills.
Christmas trees are often drawn with three triangles. This is because Christmas trees are triangular.
The top triangle is the Christmas tree’s peak and the two bottom triangles are the tree’s base.
Drawing Christmas tree can be a festive and creative experience, playing with triangle shapes, adding ornaments and lights, and capturing the holiday spirit with colorful decorations and a shining star on top. You can make your Christmas tree drawing as simple or as complex as you want.
In this Christmas Drawings Easy tutorial, we’ll be keeping our Christmas tree drawing fairly simple and we’ll also add a few decorations such as a star and Christmas lights.
Once you have completed this tutorial, you’ll end up with a beautiful Christmas tree drawing.
We’ll be creating our easy to draw Christmas tree drawing picture using the following materials:
Follow along and learn how to draw a Christmas tree sketch.
We’ve included all of the steps in detail so that the process is easy to follow.
So, if you’ve got your art supplies ready, let’s get started!

The collage above shows each step of the process so you know how to draw a Christmas tree easy drawing should look like at each stage.
Tip: Make sure you don’t press too hard on the paper when you draw your pencil lines so that you can correct your mistakes with an eraser as you go through the tutorial.
This will also make it a lot easier to erase pencil lines when you finish your artwork.
Draw a single triangle just above the center of your paper. Make sure this triangle is a medium size.

Draw a smaller triangle on top of the first one. This will be the top of your Christmas tree.

Draw a third triangle below the triangle you medium size triangle you added in step 1.
This triangle should be slightly larger than the other two triangles.
Don’t worry if the triangles are not perfectly aligned – they are just a guide to draw around and they will be removed with an eraser later.

Tip: Use thicker pencil lines to make the branches look more textured and realistic. You can use a softer pencil (like a “B” pencil) to create a thicker liner or if you have a normal pencil (like an HB pencil), just draw over the lines a few times to make them thicker.
First, add branches to your smaller triangle. Start from the top left side.

Add branches to your middle triangle on the top left side.

Draw more branches to your middle triangle on the bottom left side.

Add branches to your largest triangle. Start from the top left side.

Add more branches to your largest triangle on the bottom left side.
Next, we’ll create the branches on the right side of your tree from the top to the bottom.

Add branches to your smaller triangle. Start from the top right side.

Add branches to your middle triangle on the top right side.

Draw more branches to your middle triangle on the bottom right side.

Add branches to your largest triangle. Start from the top right side.

Draw more branches to your largest triangle on the bottom right side.

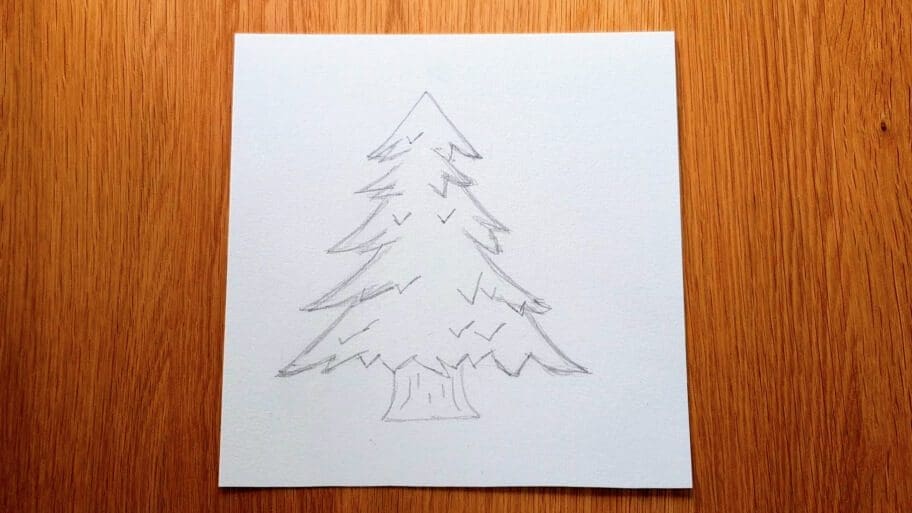
Erase any unwanted pencil lines inside the Christmas tree.

Make your tree more realistic. You can do this by adding some pencil strokes to the branches.
Then draw more small zigzag shapes for the branches at the bottom of your Christmas tree.

Draw two vertical lines at the bottom of your tree to create a trunk. Make the lines curve out into a point at the bottom so that it looks like a real tree trunk.
Then draw a horizontal line to connect the two vertical lines.
Then add some pencil strokes to the trunk to add texture and make your tree look more realistic.
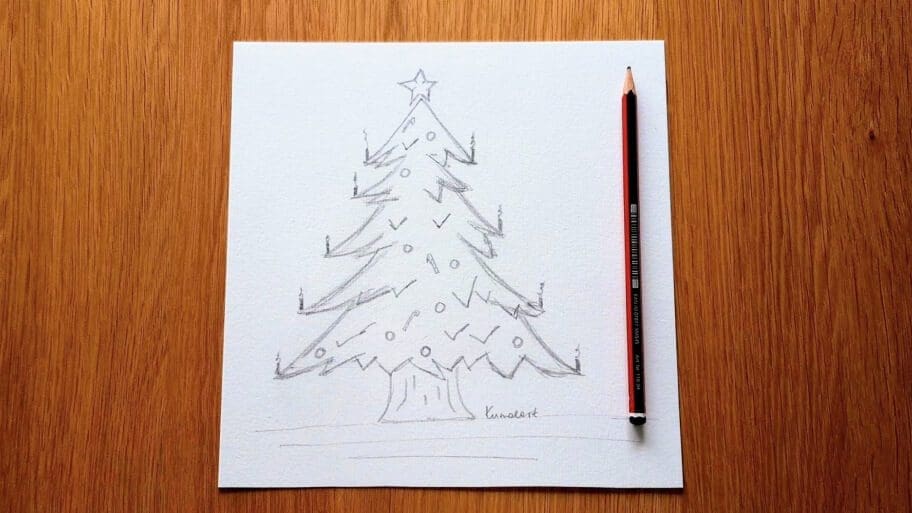
At the top of the smallest triangle, add a five-pointed star.
If you want to know how to draw a perfect five-pointed star, check our Basic Patterns to Draw tutorial.

Note: We’ve drawn some darker pencil lines around our star to make it more visible.
Now that you have the basic tree shape, it’s time to add some Christmas lights! Start by drawing a small candles at the tip of each triangle.

Draw some small circles inside your tree to create the Christmas tree baubles.

Add more details to your Christmas tree like ribbons or any other ornaments.

Draw a few straight lines across your tree to create a floor line.

There you have it. Now you know how to draw a Xmas tree! Don’t forget to add a signature at the bottom of your masterpiece.

Don’t worry if your tree isn’t perfect the first time, the more you practice the better you will get!
Be sure to practice this Christmas tree drawing until you get it just right. How to draw a Christmas tree realistic can be broken down into a few simple steps. Christmas tree to draw can be as simple or as elaborate as your creativity allows, turning each stroke into a festive symbol of joy and celebration.
Hope you enjoyed this easy drawing Christmas tree step by step tutorial and you learned something new today!
Drawing a complex or detailed Christmas tree drawing hard way might require some extra attention. Here are five tips:
Remember, drawing a complex Christmas tree might take practice and patience. Break the process into smaller steps and enjoy the creative challenge!
Soon, you’ll be a master at Christmas tree drawings! Use royalty-free images to draw other tree shapes or check out our How to Draw a Palm Tree Step by Step tutorial, How to Draw an Apple Tree tutorial, and How to Draw a Cherry Blossom Tree tutorial to continue your drawing journey!
Are you looking for more drawing ideas? Search our list of 101+ Drawing Ideas!
Happy drawing!

