There are no results matching your search Reset filters?
How to Draw a Palm Tree Step by Step - 25 Steps to Create a Step by Step Palm Tree Drawing Easy Sketch!

- By Joanna | updated in March, 2024
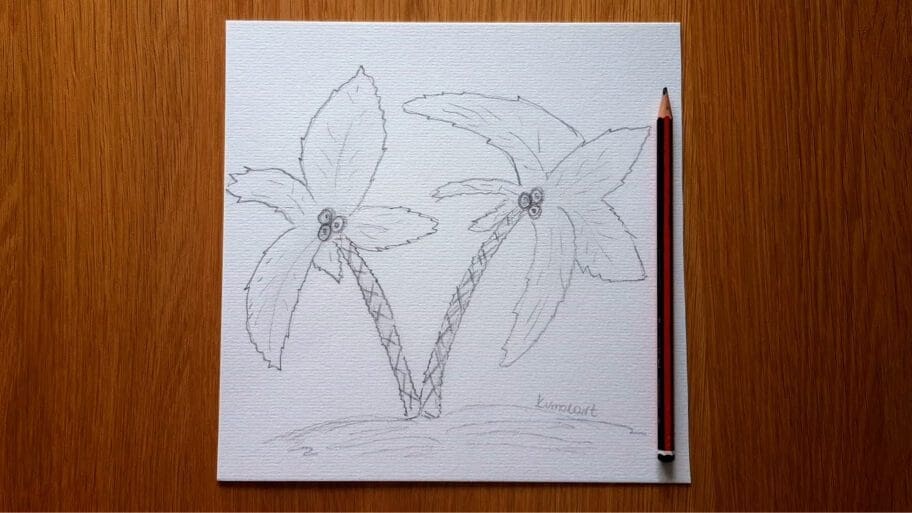
In this fun and easy palm tree drawing tutorial, you’ll learn how to draw a palm tree step by step.
This drawing a palm tree step by step tutorial is great for beginner artists (both kids and adults) who want to improve their drawing skills.
The palm tree is one of the most popular trees and it is an important symbol in many cultures.
It has a unique shape and can be used as a great subject for a drawing.
Fun Facts: Did you know that there are over 2600 species of palm trees? And they can be up to 20 feet long?
Palm trees are also found in a wide variety of climates and environments.
Once you have completed this tutorial, you’ll end up with an awesome palm tree drawing.
Table of Contents
ToggleWhat You’ll Need for Your Simple Palm Tree Drawing Step by Step Sketch:
We’ll be creating our easy palm tree drawing using the following materials:
- A piece of paper
- A pencil
- An eraser
How to Draw a Palm Tree Step by Step Easy Sketch
Follow our step-by-step tutorial covering how to draw a cool palm tree.
We’ve included all the steps in detail so that the process is easier to follow.
So, draw easy palm tree with us, and let’s get started!
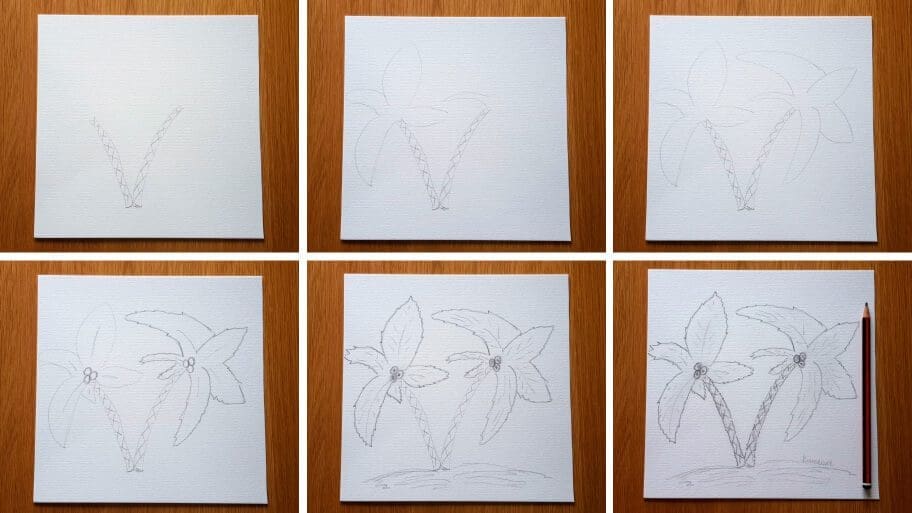
The collage above shows each step of the process so you know what your easy to draw palm tree sketch should look like at each stage.
Instructions on How to Draw Palm Trees
Tip: Make sure you don’t press too hard on the paper when you draw your pencil lines so that you can correct your mistakes with an eraser as you go through the tutorial.
Step 1: Start with Palm Trees Outline
Start by outlining two palm trees. This can be done by drawing two long curved lines on the left side and two long curved lines on the right side. Connect those lines in the middle.

Step 2: Add the Palm Tree Trunk
Draw two tiny horizontal lines in between lines drawn in Step 1 to form the palm trees’ trunks.
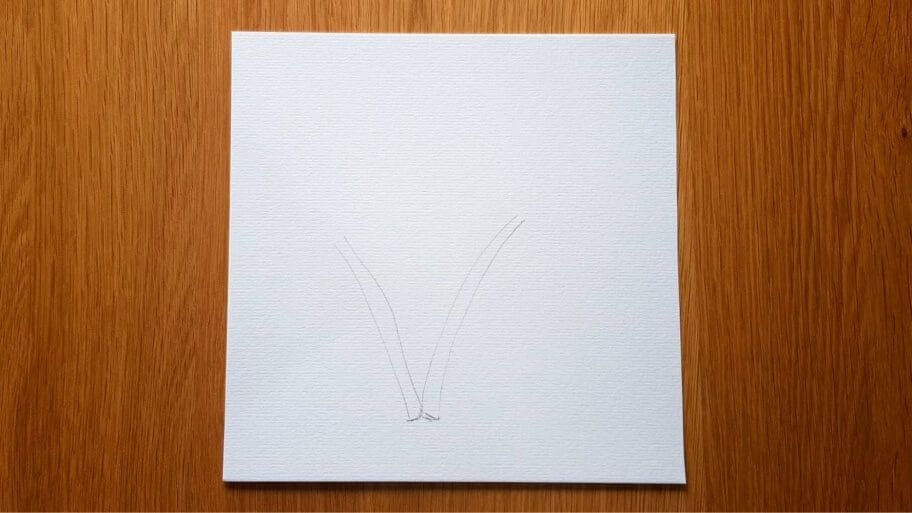
Step 3: Add the Criss-Cross Pattern 1
Draw several curved lines on the main body of the first palm tree.
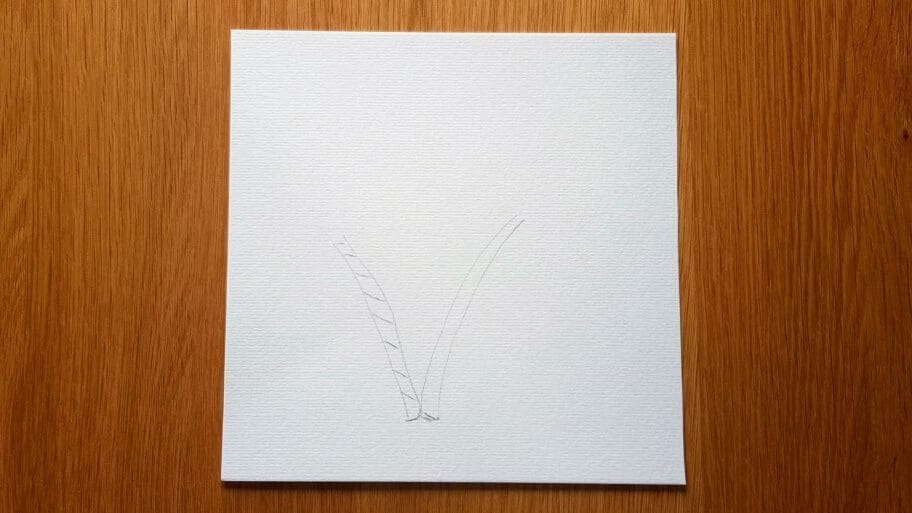
Step 4: Add the Criss-Cross Pattern 2
Draw more curved lines in the opposite direction.
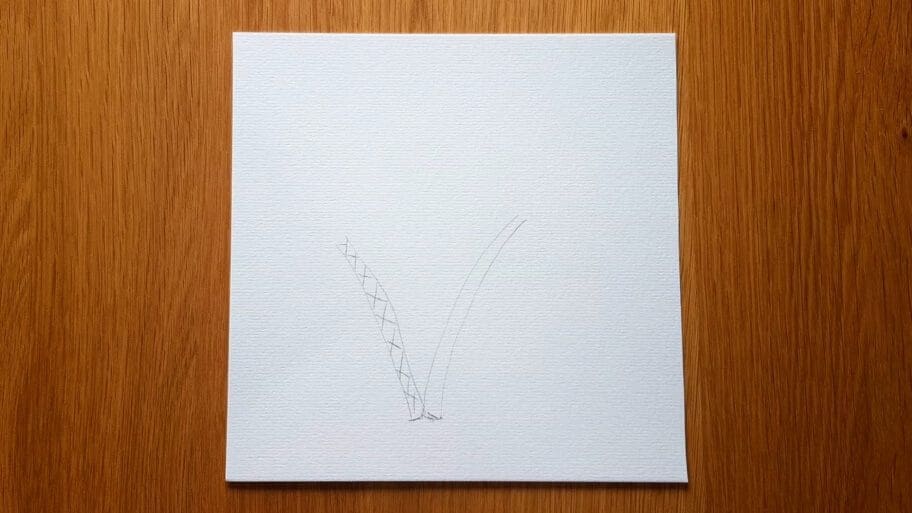
Step 5: Repeat the Process
Repeat the process with the second palm tree.
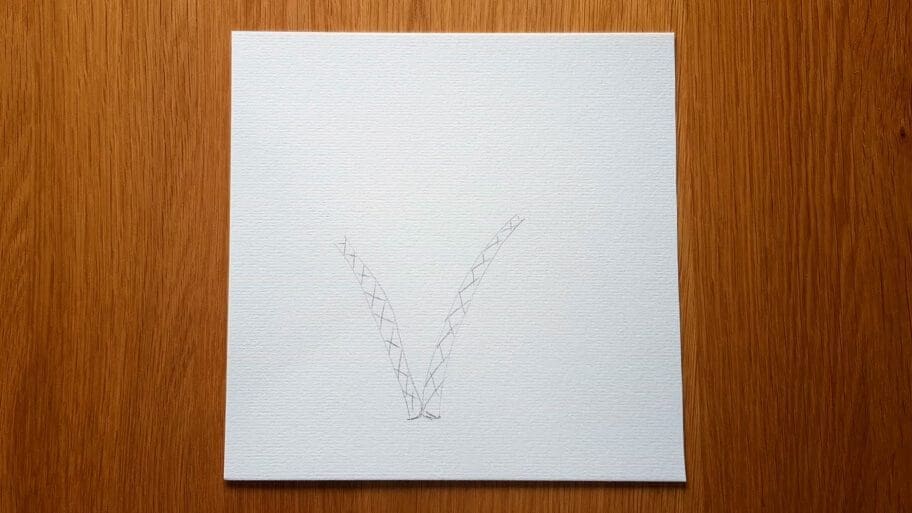
Step 6: How to Draw a Palm Tree Leaf
Now you will learn how to draw palm tree leaves.
Draw the first leaf by connecting it at the base of the first palm tree with two curved lines on each.
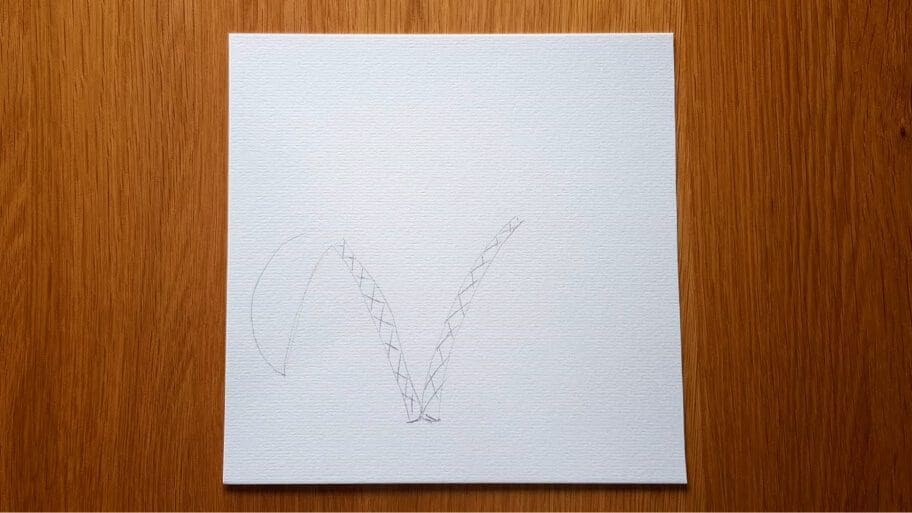
Step 7: Draw the Second Palm Leaf
Draw two curved lines just above the first leaf to form the second leaf.
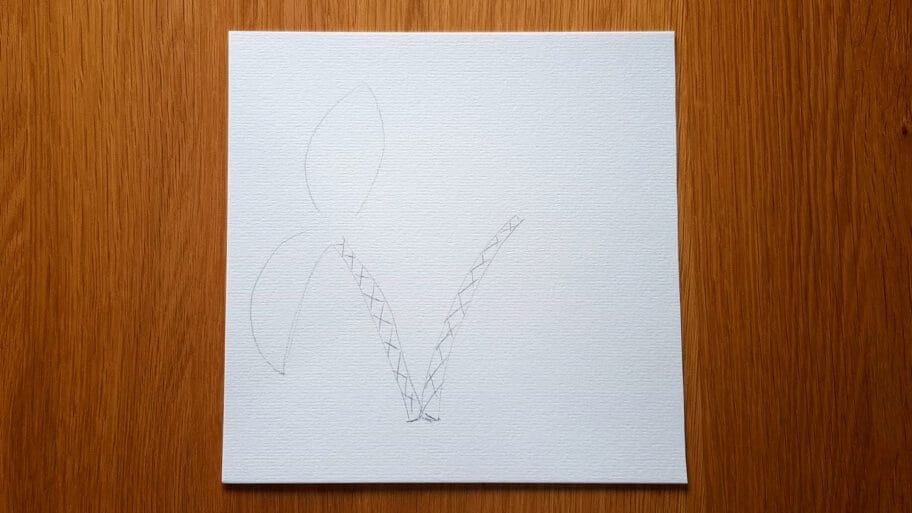
Step 8: Draw the Third Palm Leaf
Draw two curved lines on the right bottom side of the second leaf to form the third leaf.
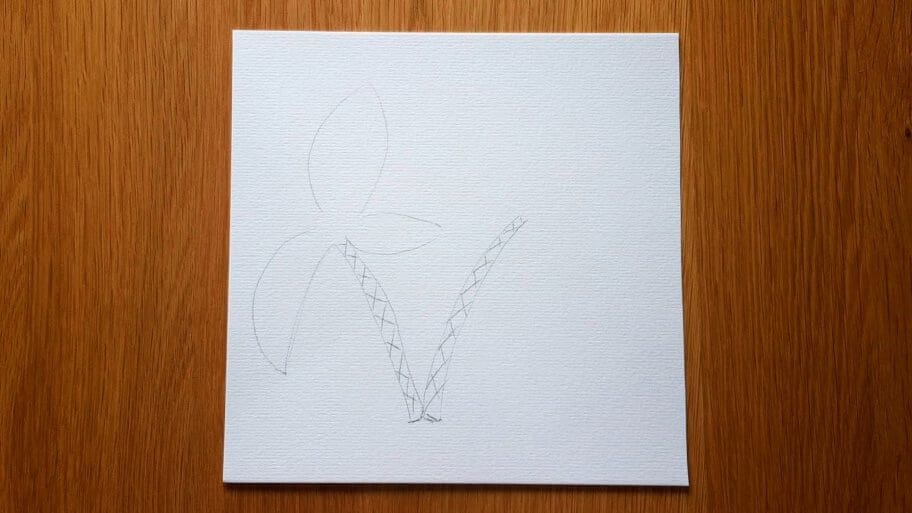
Step 9: Draw the Last Leaf of the First Palm Tree
Draw two curved lines on the left bottom side of the leaf you drew in step 7.
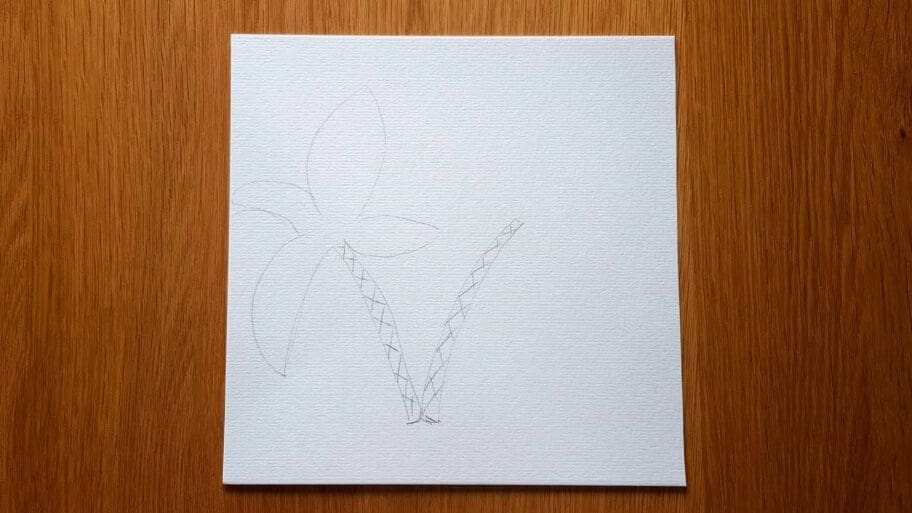
Step 10: Repeat the Process for the Second Palm Tree
Draw two curved lines on the left side of the second palm tree.
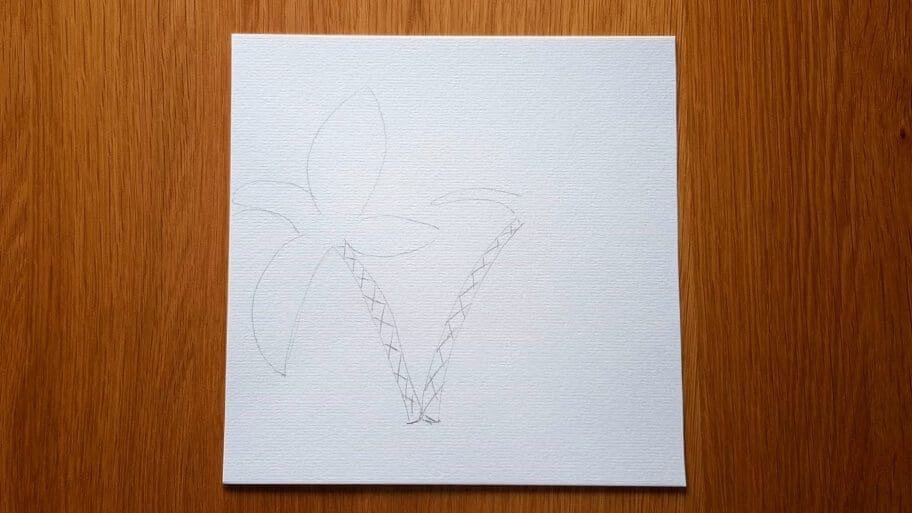
Step 11: Draw the Second Palm Leaf
Draw two curved lines just above the lines you drew in step 10.
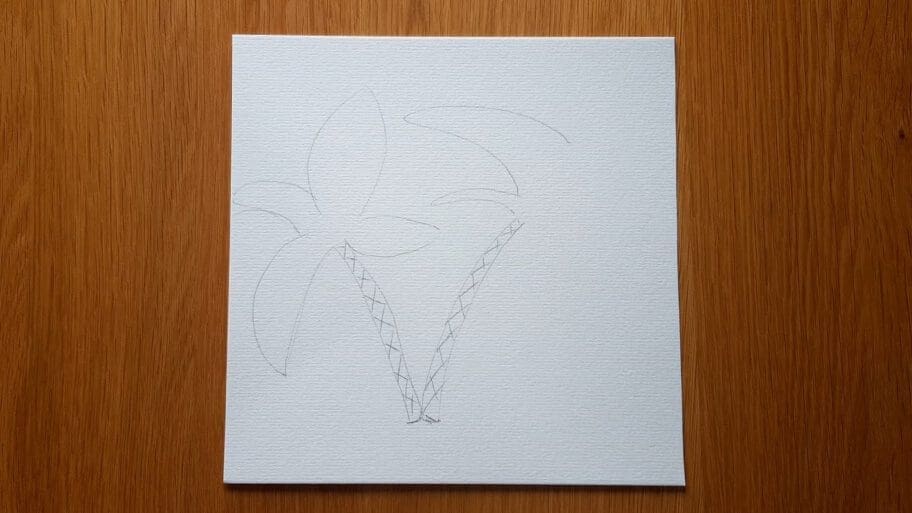
Step 12: Draw the Third Palm Leaf
Draw another two curved lines on the right side of the second palm tree.
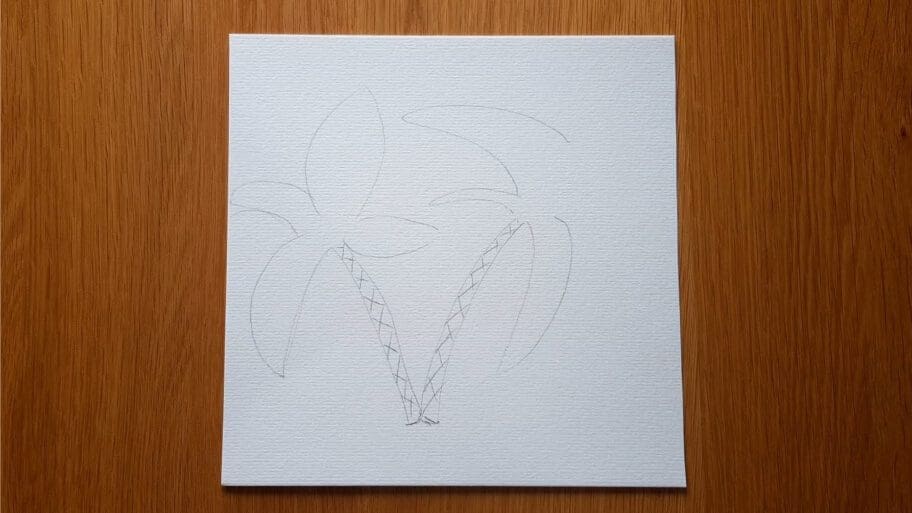
Step 13: Draw the Last Palm Leaf
Draw two curved lines just above the one you drew in step 12.
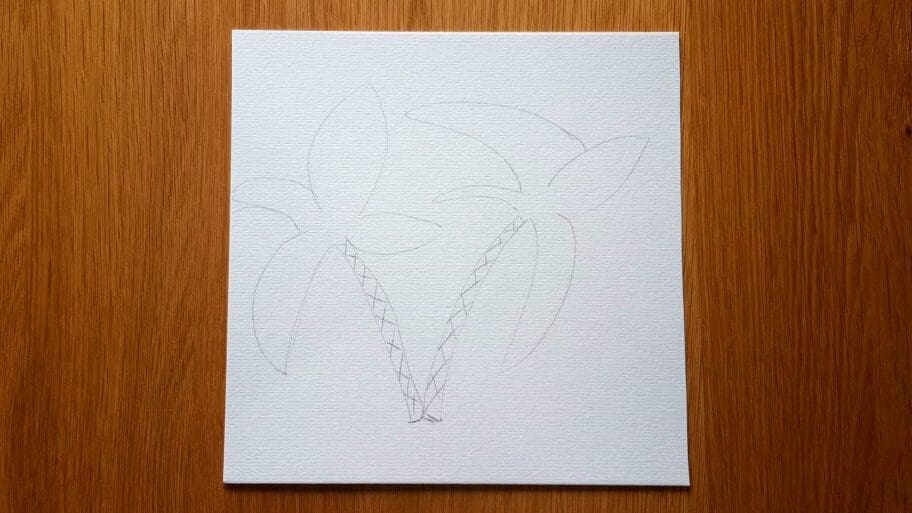
Step 14: Add Small Palm Leaves
Add one more small leaf to each palm tree.
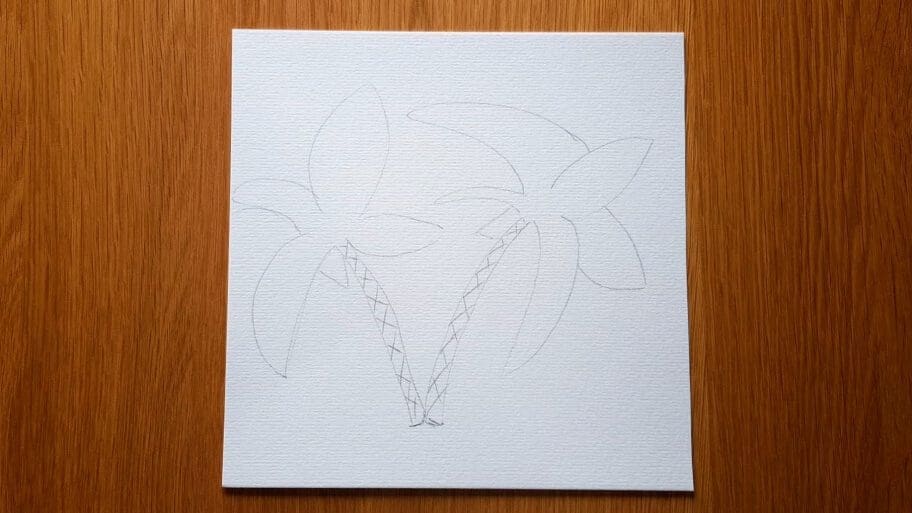
Step 15: Add the Details to the Leaves
Add a small line in the middle of each leaf.
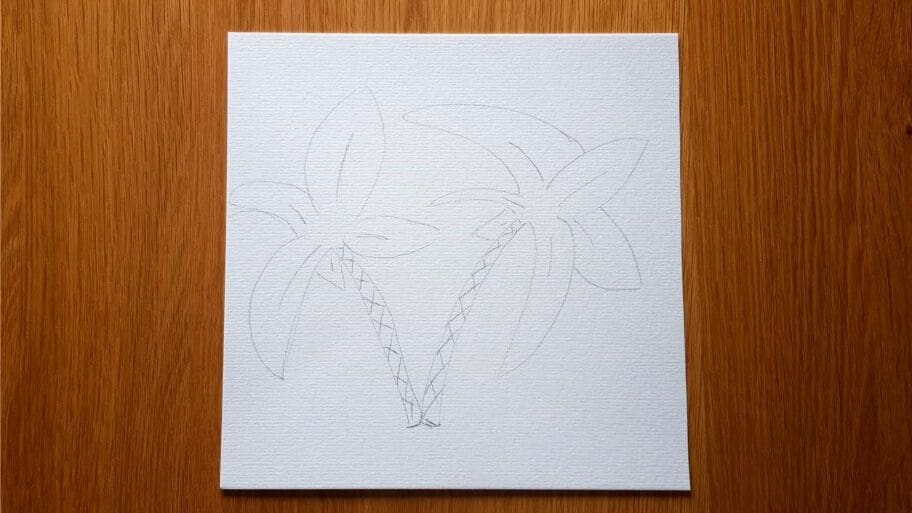
Step 16: Add the Coconuts to the First Palm Tree
Draw a few small circles in the middle of the first palm tree to form the coconuts.
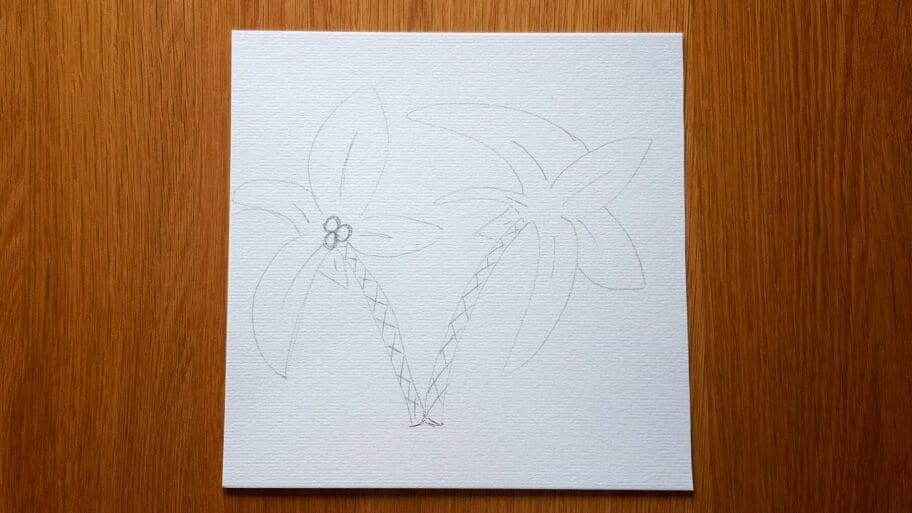
Step 17: Add the Coconuts to the Second Palm Tree
Repeat the process from Step 16.
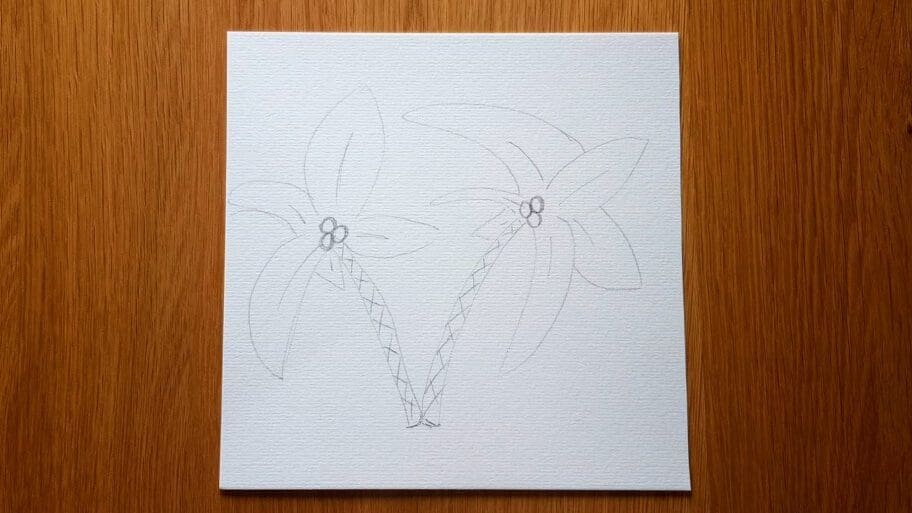
Step 18: Add Texture
To make your drawing more realistic add some zigzag patterns around each of the palm tree leaves.
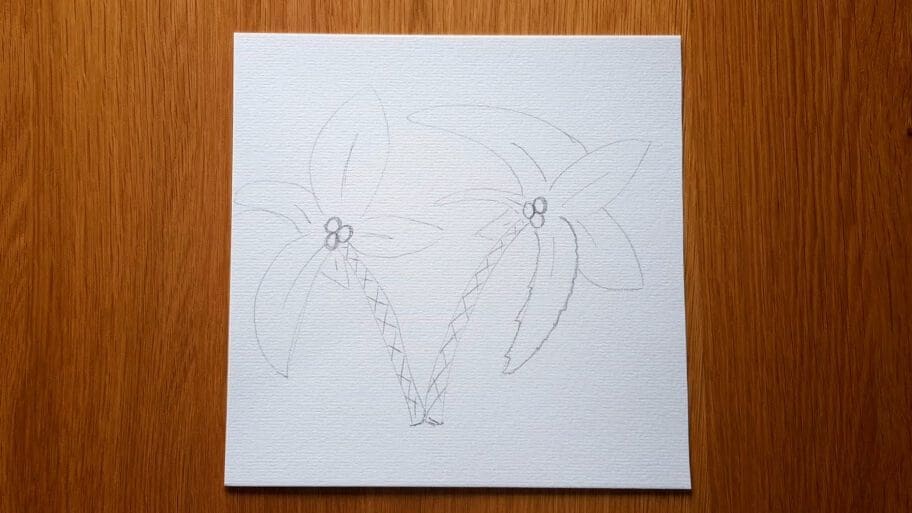
Step 19: Repeat the Process
Repeat the process from Step 18 with all of the leaves from the second palm tree.
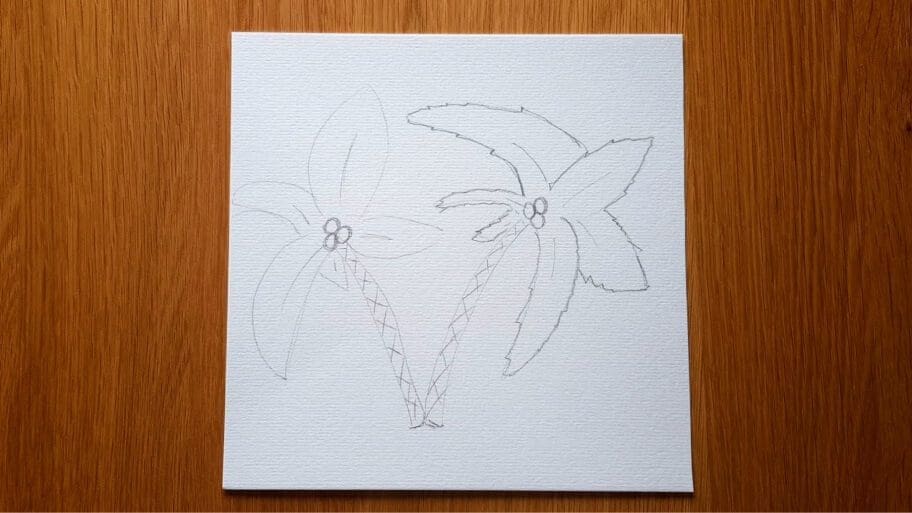
Step 20: Repeat the Process to all Leaves from the First Palm Tree
Repeat the process from Step 19.
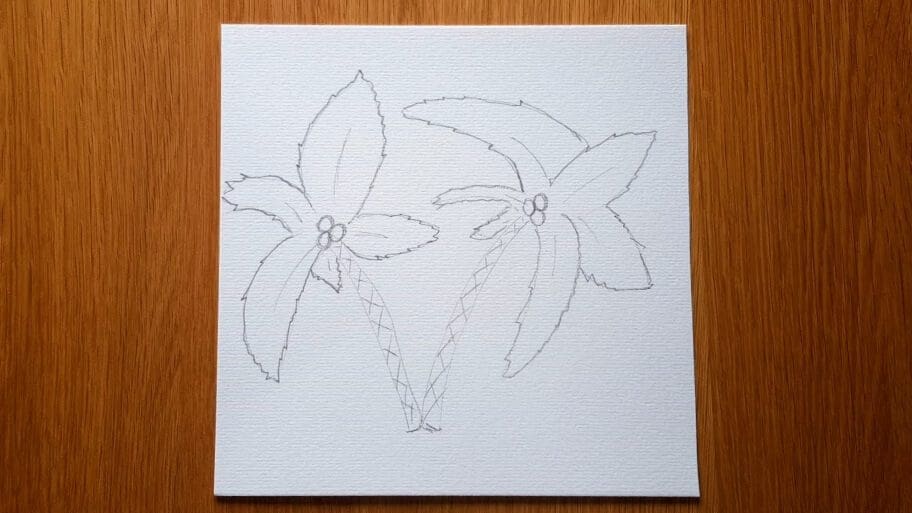
Step 21: Add the Detail to the Coconuts
Draw tiny dots inside each coconut to make them more realistic.
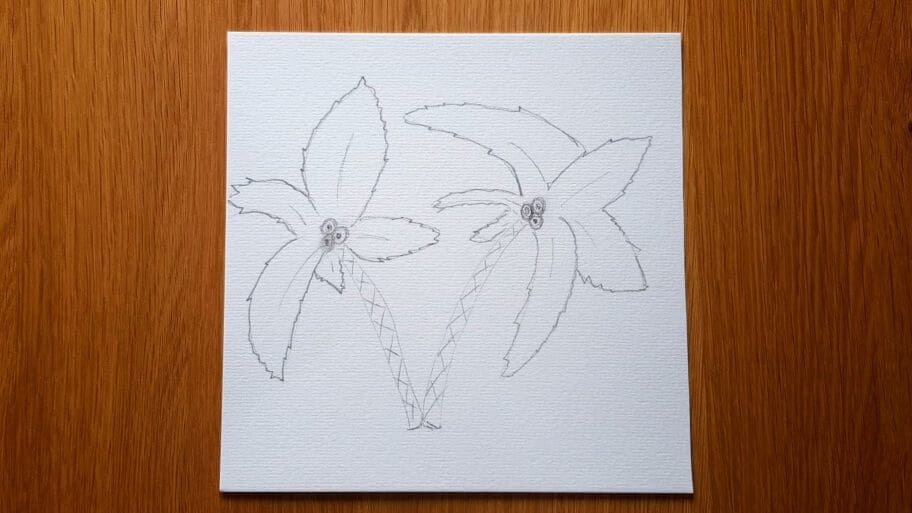
Step 22: Add Texture
Draw several tiny lines on both palm trees.
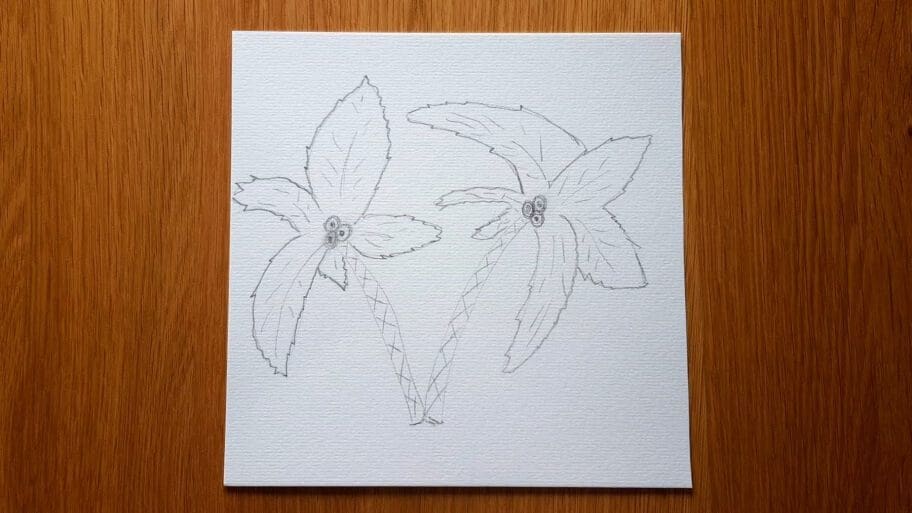
Step 23: Draw the Ground
Draw several curved lines to form the ground.
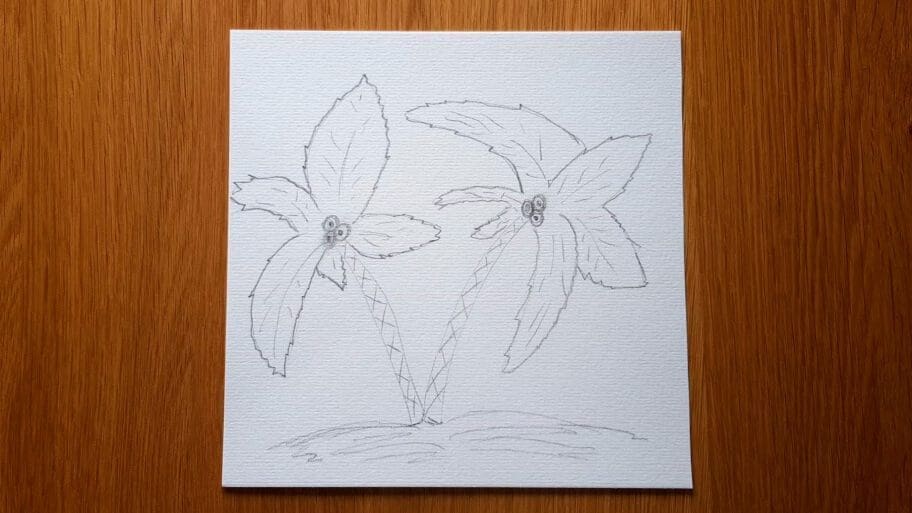
Step 24: Add the Shading
Using your fingers, smudge the pencil marks to add shading.
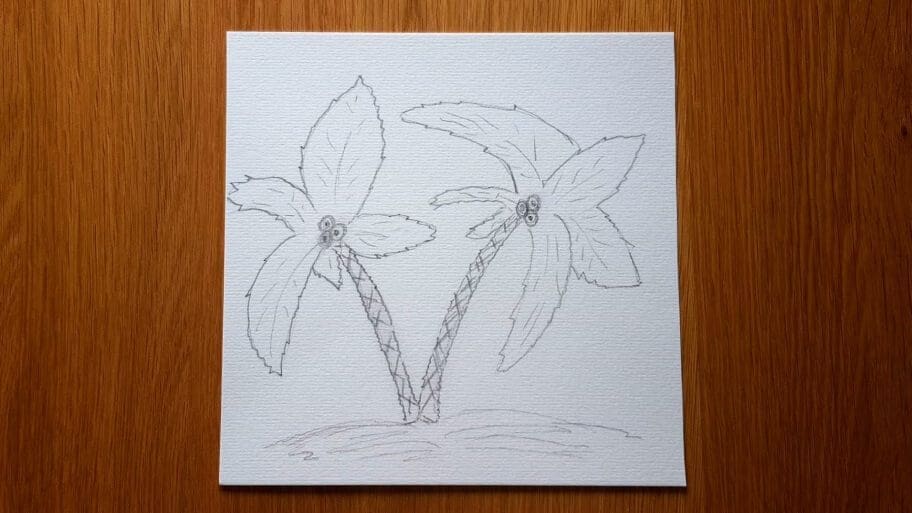
Step 25: Erase the Pencil Marks
Finally, erase any unwanted pencil lines to finish your palm tree drawing.
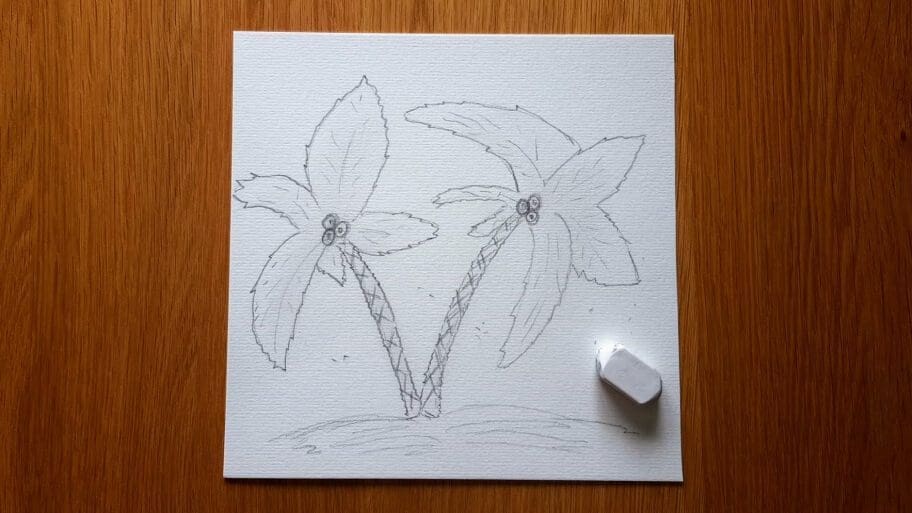
Congratulations!
There you have it. Now you know how to draw a palm tree easy way!
Don’t worry if your palm trees easy drawing isn’t perfect the first time, the more you practice the better you will get! Be sure to practice this palm tree drawing until you get it just right.
Bonus Tips on How to Draw a Simple Palm Tree Even Better
- Pay attention to the details – The key to good palm trees drawing easy is in the details, so make sure you pay attention to the small things that are easy to miss such as shadows, shading, and texture.
- Experiment with different perspectives – When drawing a palm tree, you can use different angles to show off your creative skills. Try looking at the tree from below or above for some interesting effects.
- Try adding a landscape – Drawing a landscape around your palm tree adds another dimension to your artwork and can make it even more appealing.
- Experiment with different materials – Drawing with charcoal, pastels, or markers can give your palm tree drawing a unique look and feel.
- Use reference photos – If you’re struggling with your palm tree drawing, try using a reference photo to make sure you get the proportions right.
- Try with different styles – Don’t be afraid to try out different styles and techniques when drawing a palm tree.
Then, try drawing other trees, like a Cherry Blossom Tree or a Christmas Tree.
Soon, you’ll be a master at tree drawings!
Are you looking for more similar ideas popular? Search our list of 101+ Drawing Ideas to continue your drawing journey.
Happy drawing!

Joanna
Latest Posts
Trending
There are no results matching your search Reset filters?


